This tutorial will help you create a very simple data-bound report from scratch. The following steps are explained in more details below:
- Creating a new project
- Adding a MindFusion report to the project
- Adding a data source to the project
- Adding the data source to the MindFusion report
- Creating a data-bound DataRange
- Creating a report viewer
- Running the application
1. Creating a new project
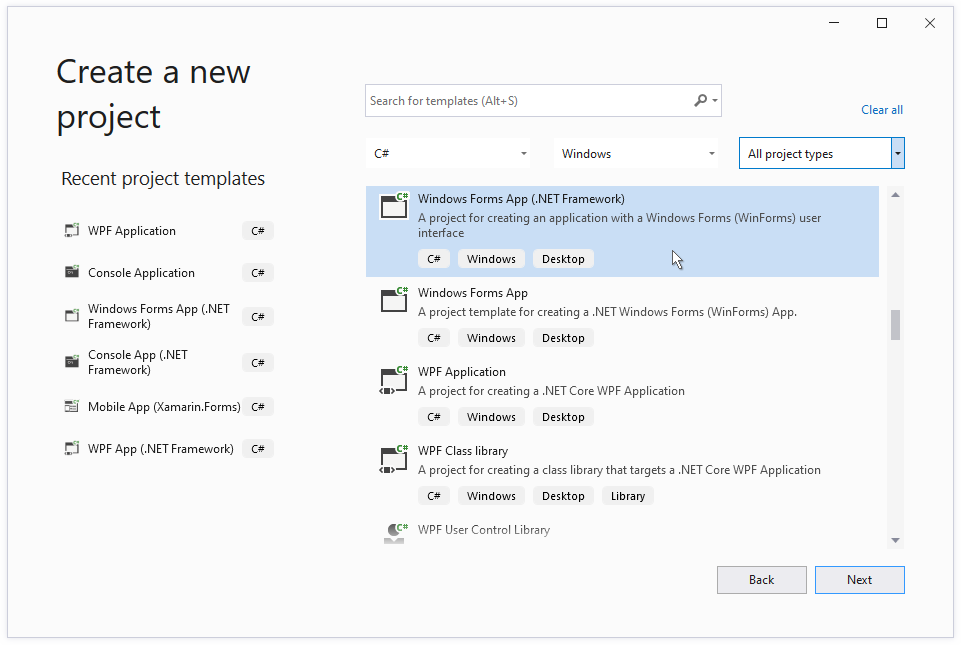
Open Visual Studio and select the File -> New -> Project menu command in order to create a new project.

In the dialog box that appears, select the Windows Forms App (.NET Framework) template, and click Next.
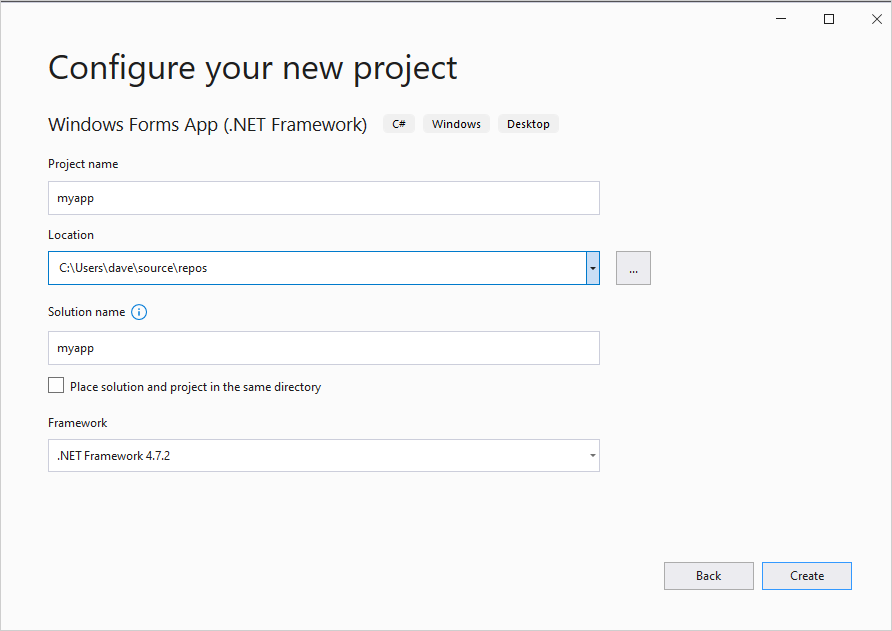
On Configure Project screen, enter the name and location of the project in respective text boxes, then click 'Create'. This tutorial uses 'myapp' as a name of the project.
2. Adding a MindFusion report to the project
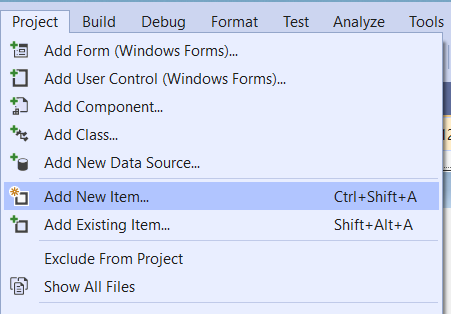
Select the 'Add New Item...' command from the 'Project' menu.
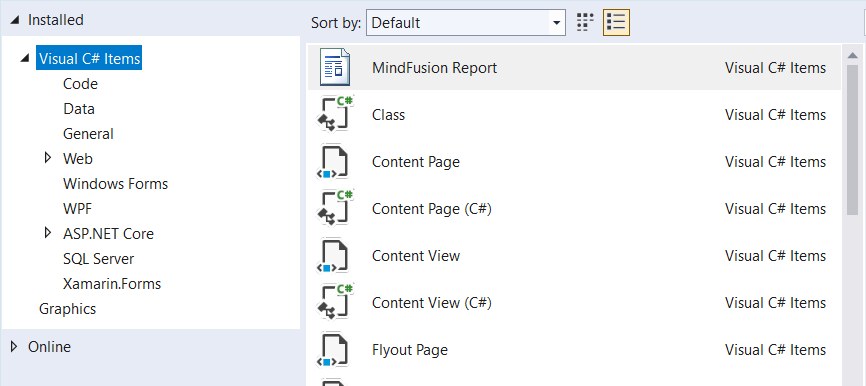
The 'Add New Item' dialog box is displayed with the list of all item templates registered with Visual Studio. Select the 'MindFusion Report' item in the list, then type the name of the report class file in the text box at the bottom of the dialog ('myreport' for the purposes of this tutorial) and click 'Add'.
A class file representing the new report is created and added to the current project. A designer for the report is automatically opened in the environment.
If you have not installed the report template, you could use the Component template instead, and change its base type to Report.
3. Adding a data source to the project
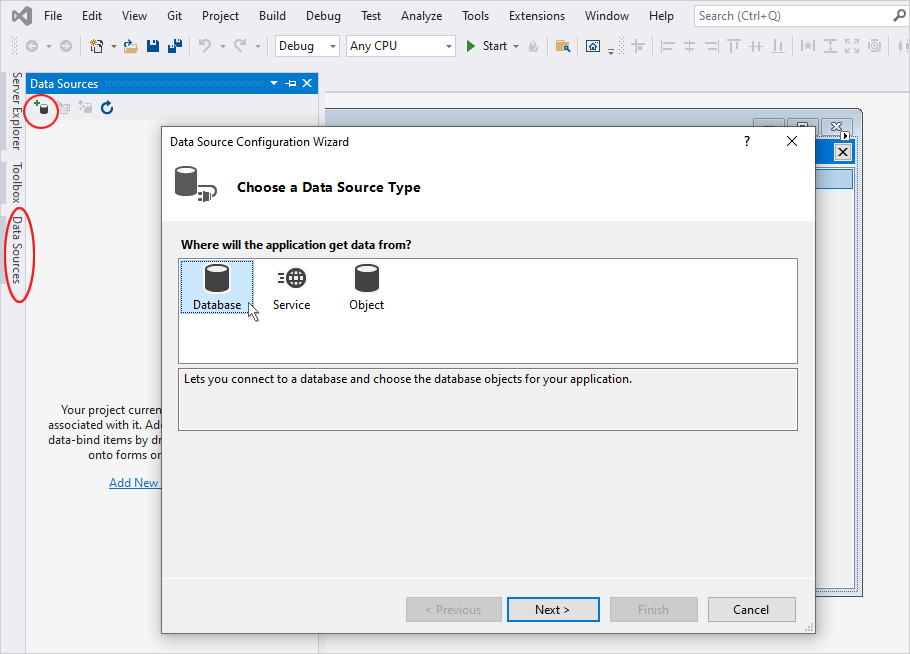
Select the "Data Sources" tab from the tabs at the left side of your Visual Studio, or press Shift+Alt+D to show it. Click on the "+" icon in the icon header of the panel that appears. The "Data Source Configuration Wizard" starts.
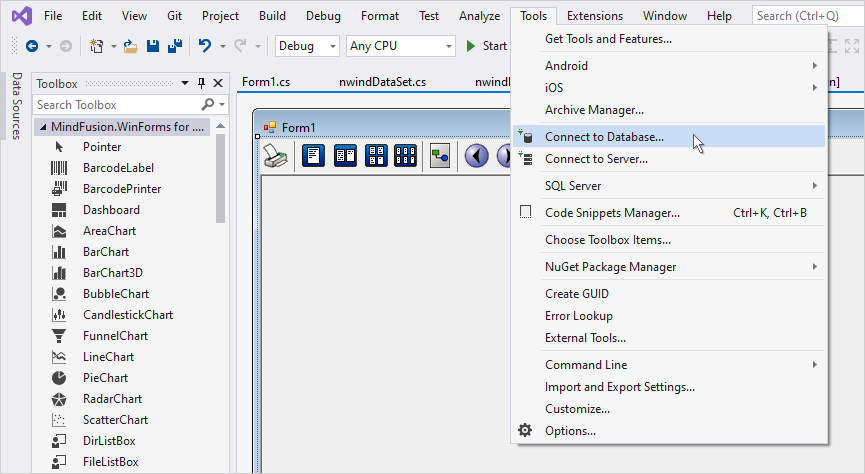
Alternatively, you can start the Data Source wizard from the "Tools -> Connect to Database" menu in Visual Studio:
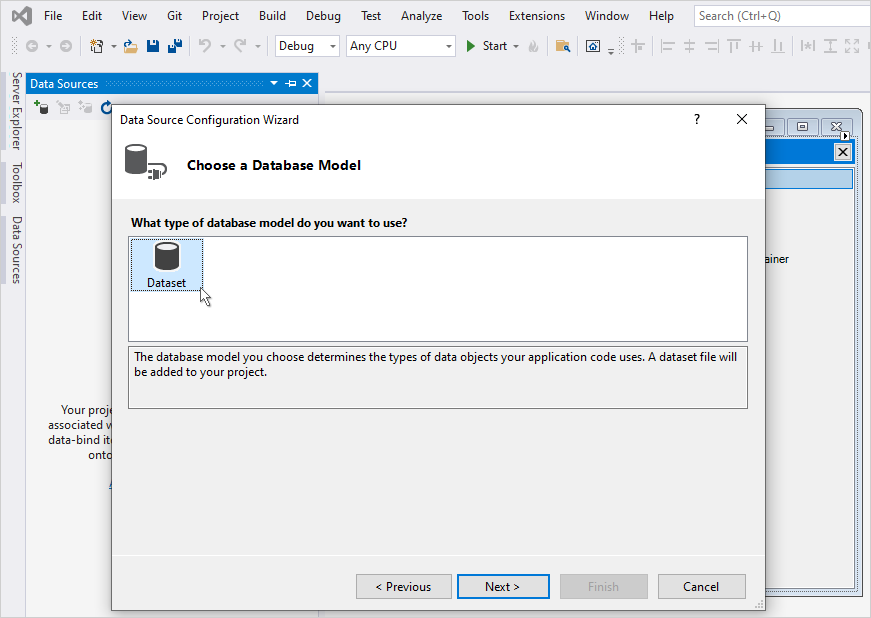
Choose the Dataset database model:
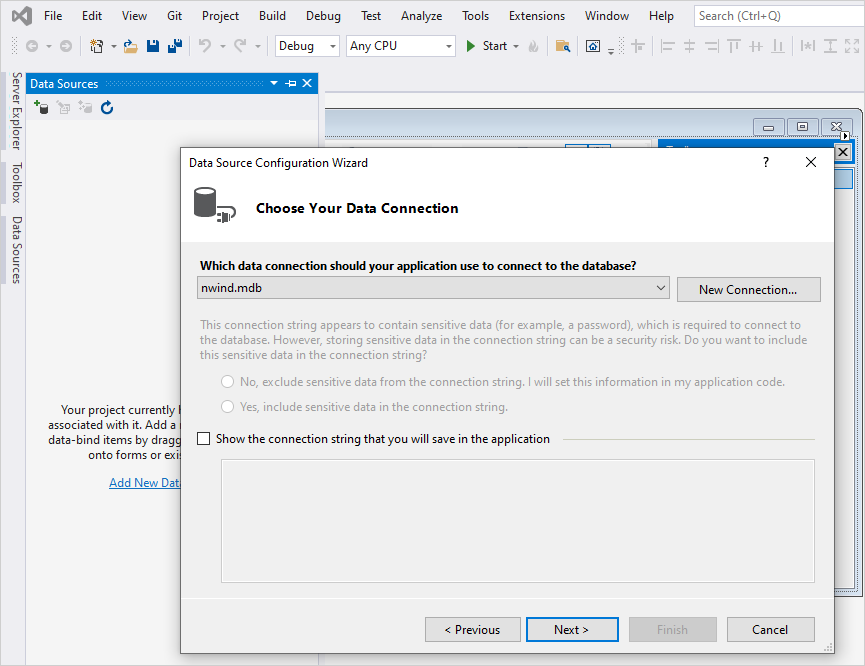
In the next step of the wizard, set up the database connection.
- Click on the 'New Connection' button and enter the information required to describe the connection in the 'Add Connection' dialog box that appears. This tutorial uses the nwind.mdb file supplied with the project installation as its data source. For this purpose, select 'Microsoft Access Database File (OLE DB)' as a data adapter and enter the path to the nwind.mdb file as a database file name.
- Click 'OK' to close the 'Add Connection' dialog box, then click 'Next' to move to the next step of the wizard. Visual Studio will ask you whether you want to copy the mdb file to your project directory and modify the connection string to reflect this. Select 'Yes'.
 Note Note |
|---|
After saving the connection string, a new app.config file is added to your project, and it appears in the Solution Explorer. |
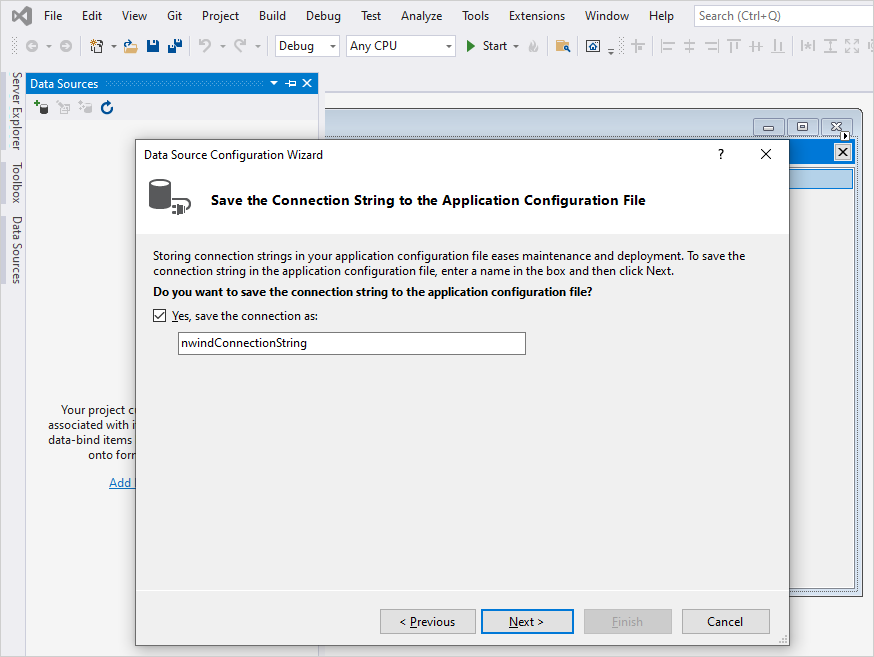
On the following step save the connection under the default name 'nwindConnectionString', then click 'Next'.
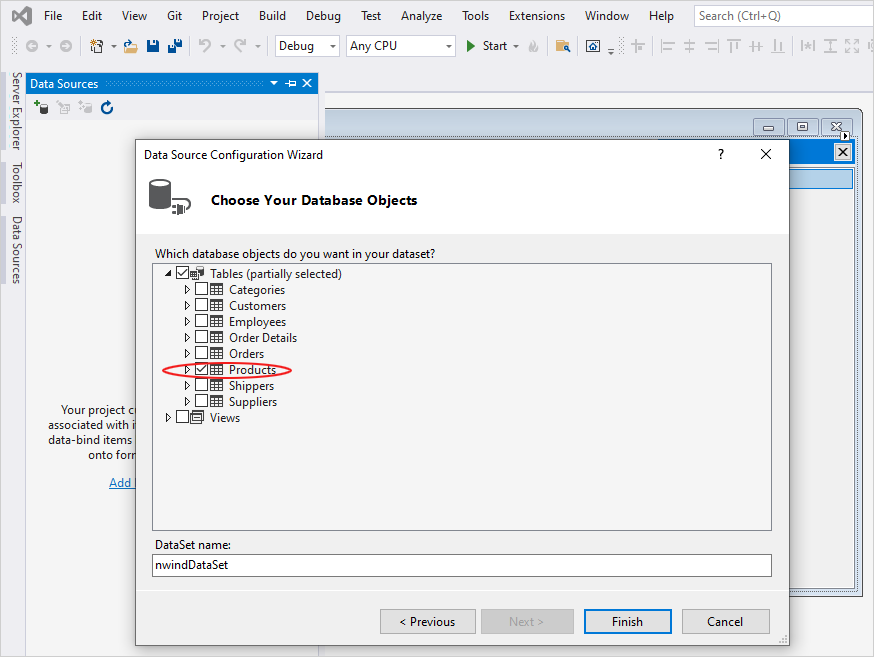
Select the database objects you want to import in the project.
Expand the 'Tables' node and select the 'Products' table by placing a check in the box to its left. Type the name of the imported dataset in the text box at the bottom of the dialog (this tutorial uses the default - nwindDataSet), then click 'Finish'.
4. Adding the data source to the MindFusion report
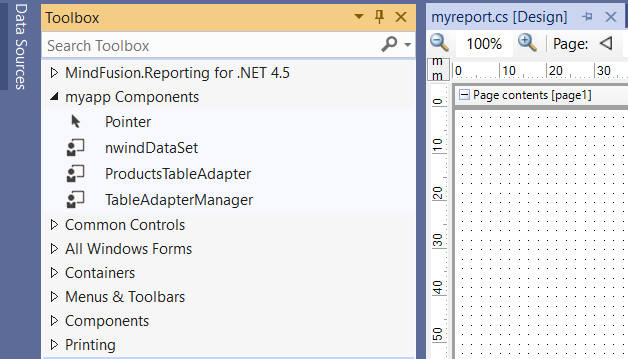
Rebuild the project and wait a few seconds for the toolbox to refresh. A new category should appear in the toolbox. It is named after your project (in this particular case - 'myapp Components'). There are two items in this category - nwindDataSet and ProductsTableAdapter representing the data set and the data adapter for the Products table respectively.
 Note Note |
|---|
If the toolbox is not visible, you can display it through the 'Toolbox' command in the View menu or by using the respective shortcut key combination (CTRL+ALT+X by default). |
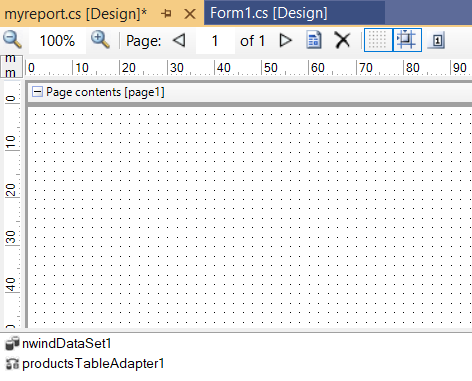
Now that the data items are visible in the toolbox, double-click on the dataset and table adapter to create an object of the corresponding type within the report. Alternatively, you can drag the items from the toolbox and drop them onto the report design surface. The newly created data objects appear in the list at the very bottom of the report designer.
5. Creating a data-bound DataRange
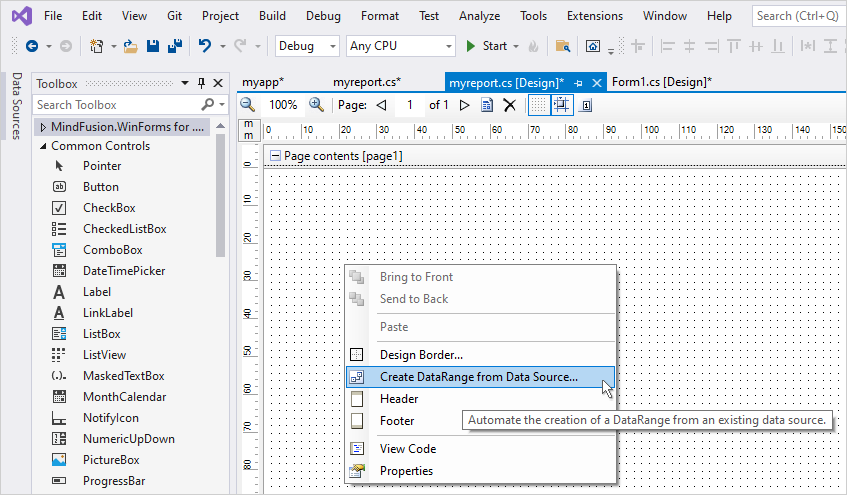
Right-click on the report design surface and select the 'Create DataRange from Adapter...' command from the context menu.
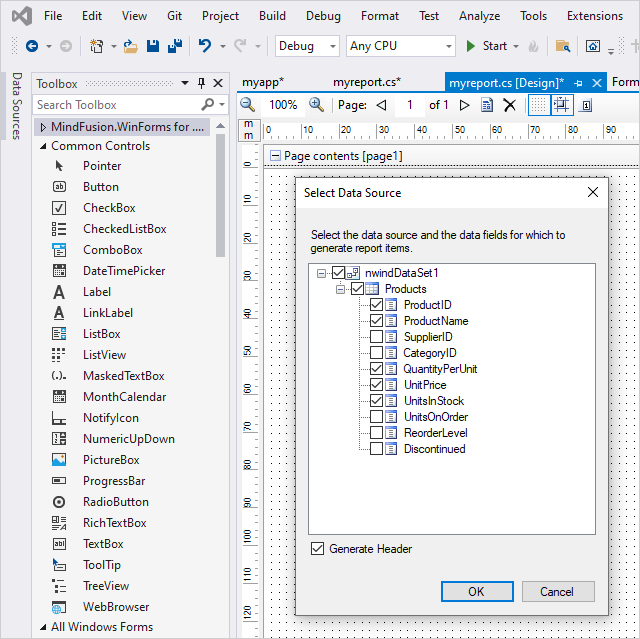
In the 'Select Data Source' dialog box that appears, place a check on those fields from the Products table you want to have displayed by the report. The tutorial uses ProductID, ProductName, QuantityPerUnit, UnitPrice and UnitsInStock.
Select the 'Generate Header' option at the bottom of the dialog box in order to generate a header for the DataRange and click 'OK'.
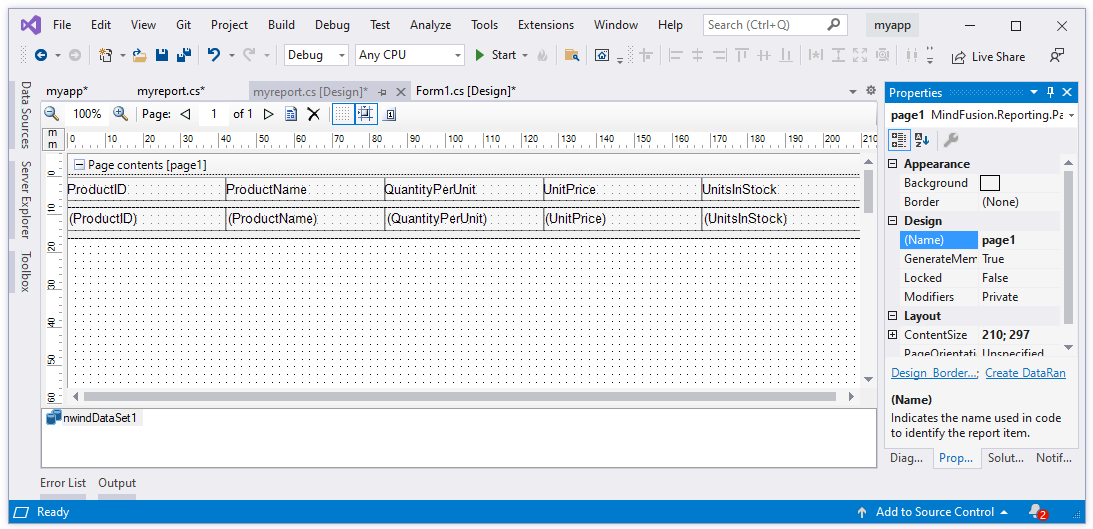
A new DataRange appears in the report. The DataRange contains five labels bound to the selected fields. The labels are evenly distributed along the width of its parent DataRange. The DataRange also includes a header containing labels with the static names of the displayed fields.
The DataRange is already bound to the Products table. However, the table adapter needs to be filled with information from the database. Unfortunately this cannot be performed in the designer. Instead, we have to manually modify the source code of the report.
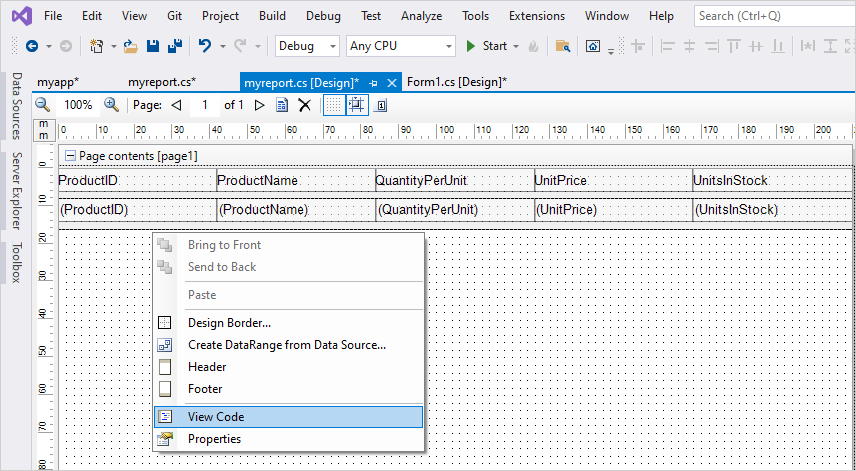
Right-click on the report and select the 'View Code' command from the context menu.
Locate the constructor of the report within the source code and add the following line of code right after the call to InitializeComponent (note, that the newly added code is outlined in bold):
C#
 Copy Code Copy Code
|
|---|
public myreport() |
Visual Basic
 Copy Code Copy Code
|
|---|
Public Sub New() |
The report is ready to use. Close it and return back to the main application form designer.
6. Creating a report viewer
Open the main Form of your application. I you have installed the Reporting component, you will have several reporting items in a group called "MindFusion.Reporting for .NET". Drag and drop the ReportViewer component.
If you have not installed the Reporting library, you have to right-click on the Toolbox, choose "Choose Items" and in the dialog navigate to the location of the MindFusion.Reporting.WinForms.dll. Once you select it, VS will add the ReportPrinter and ReportViewer components to the toolbox. They should be initially selected, so simply confirm the import by clicking 'OK'.
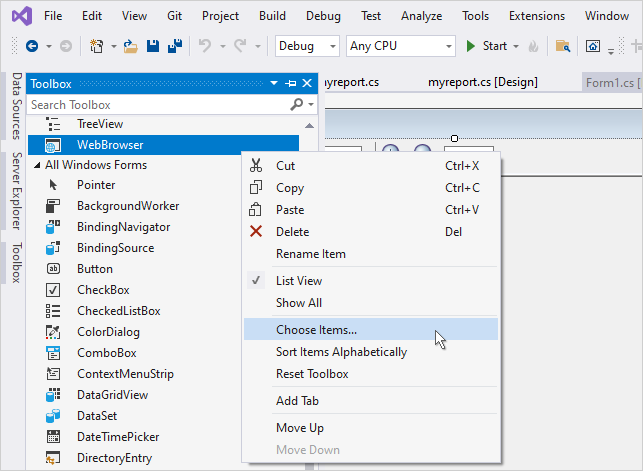
Double-click on (or drag and drop) the ReportViewer component to add it to the form.

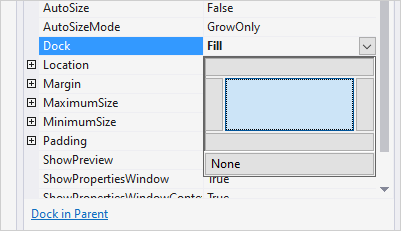
While the newly added ReportViewer component is selected on the form, open the 'Properties' window and modify the value of its Dock property from None to Fill, as illustrated below:
 Note Note |
|---|
You can display the 'Properties' window through the 'Properties Window' command in the view menu or by using the respective shortcut key combination (ALT+ENTER by default). |
Now that we have a report viewer and a ready report class, all we need to do is create an instance of the report and select this instance in the viewer. We have to do this manually in the code of the form class. Right-click on the form designer and select the 'View Code' command from the context menu.
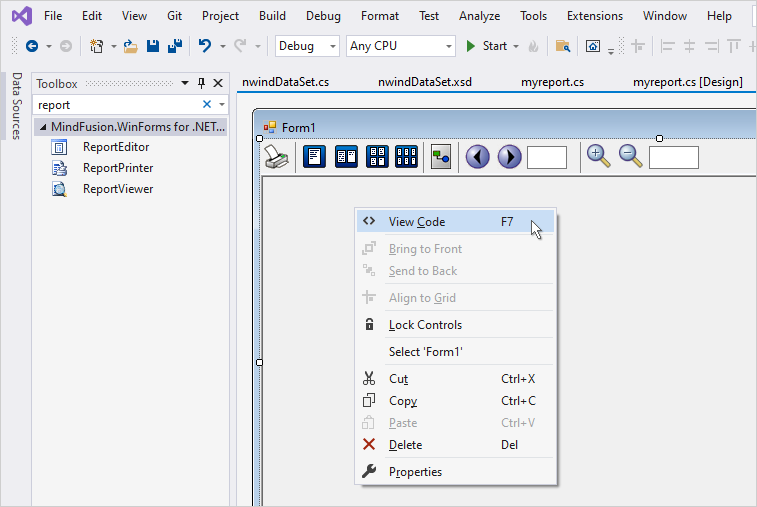
Locate the form's constructor within the source code and add the following lines of code right after the call to InitializeComponent (note, that the newly added code is outlined in bold):
C#
 Copy Code Copy Code
|
|---|
public Form1() |
Visual Basic
 Copy Code Copy Code
|
|---|
Public Sub New() |
7. Running the application
The application is ready. Compile and run to see the result. After expanding the main application form, it should look similar to the following:
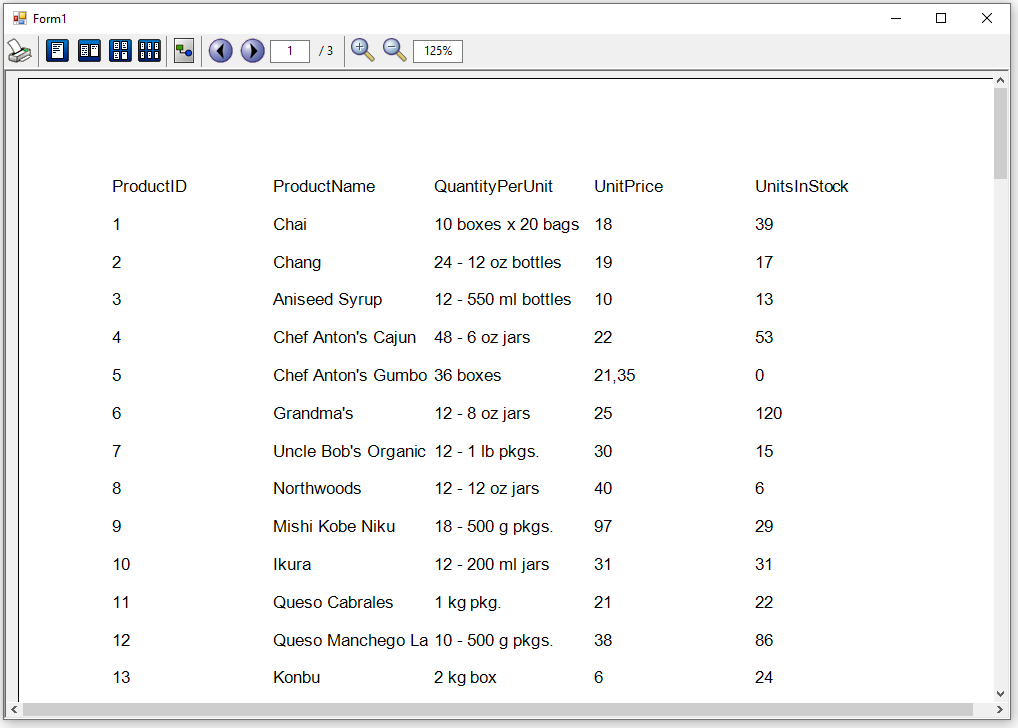
Click the 'Print' button in the viewer's toolbar to print the report.


