


Create a database connection
- In the Server Explorer, right-click the Data Connections node and choose Add Connection.
- Select the data source (for example, Microsoft Access Database File), and click Continue.
- In the Add Connection dialog box, click Browse and select the database file name (for example 'Sales.mdb'), test the connection and press OK. The selected database appears in the Server Explorer, under the Data Connections node.
Add data source
- On the Visual Studio Data menu, select Add New Data Source. This will display the Data Source Configuration Wizard, which will automate the process of adding a new data source to your application.
- Select Database, then click Next.
- Click the New Connection button to create a new database connection. If you have already created the database connection (as shown above through the Server Explorer), click Next.
- Save the connection string to the application configuration file. Click Next.
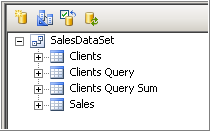
- Choose the database objects
Expand the Tables node, select the Table that you want to use, and then click Finish. The DataSet is added to your project and the selected table appears in the Data Sources window. - On the Data menu, select Show Data Sources. The DataSet is displayed in the Data Sources window.
- To preview the added data source, right-click the DataSet, and select Preview Data.

- Rebuild the project