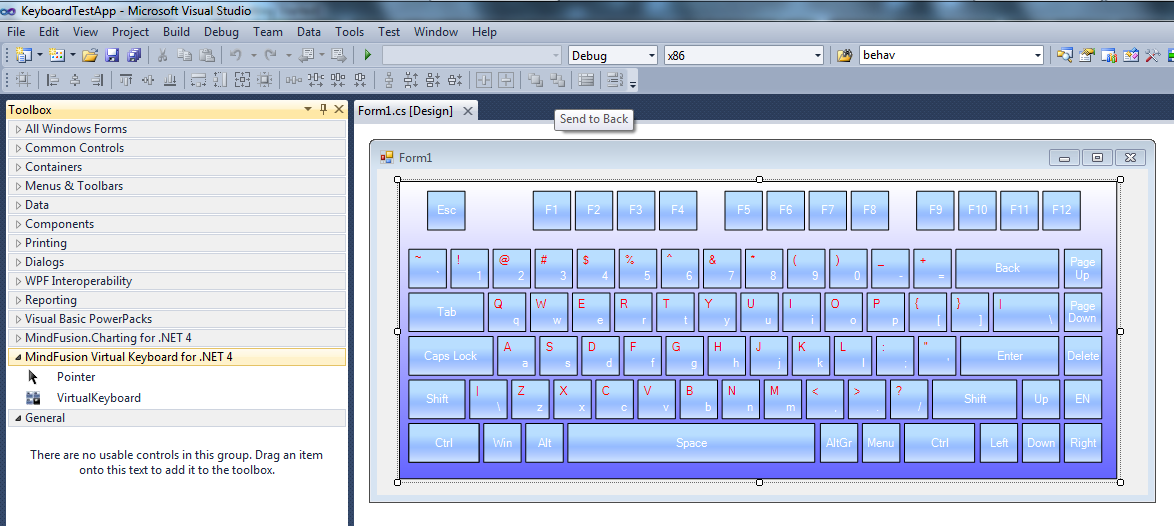
Add VirtualKeyboard from toolbox
If you have installed the library locally and targeting .NET 4, or added the nuget package, you should be able to add VirtualKeyboard control from the Visual Studio toolbox:
- Open the form in design mode.
- Open the Visual Studio toolbox.
- Select and drag the VirtualKeyboard icon to your form.

Add VirtualKeyboard from code
If VirtualKeyboard is not available in the toolbox, you can create it from code-behind:
C#
 Copy Code Copy Code
|
|---|
using MindFusion.UI.WinForms;
...
public KeyboardForm()
{
InitializeComponent();
keyboard = new VirtualKeyboard();
keyboard.Dock = DockStyle.Fill;
Controls.Add(keyboard);
}
VirtualKeyboard keyboard; |
Customize the keyboard properties
Now you can set properties of the VirtualKeyboard by setting their values in code, or using the Visual Studio 'Properties' window.
- If the keyboard should set keystrokes to external processes, set the IsStandAlone property to true, which makes the main window non-activatable so that it does not steal keyboard focus from target process.
- Set the Theme property to select keyboard's appearance.
- Set the Mode property to specify whether the control should show smaller laptop-like keyboard layout, extended layout with numpad and navigation blocks, or a custom layout.
- Use the Virtual Keyboard Creator tool installed with the control to create a custom layout file, and either assign it to TemplateLayout, or store it in LayoutsFolder.
Further reading
Browse the topics under
Programming Interface Overview for conceptual information. Check the sample projects provided with Virtual Keyboard's distribution for sample source code.

 Copy Code