


Tutorial 3: Adding Resources
This tutorial shows how to create resources and associate them to activities with MindFusion.DataViews for WPF.
Follow steps 1 and 2 from Tutorial 2.
To create the resources you could use the built-in Resource class. To allocated them to resources you can use the built-in ResourceAllocation class. Create a collection that will hold the Resource objects and a collection that will hold the ResourceAllocation objects:
C#
 Copy Code Copy Code
|
|---|
ObservableCollection<Resource> resources = new ObservableCollection<Resource>(); |
| Visual Basic
Copy Code
|
|---|
Dim resources As New ObservableCollection(Of Resource)() |
Next, create three Resource objects and then allocate these resources to some of the already created Activity objects through four ResourceAllocation objects. For example:
| C#
Copy Code
|
|---|
Resource r1 = new Resource() ResourceAllocation ra1 = new ResourceAllocation() |
| Visual Basic
Copy Code
|
|---|
Dim r1 As New Resource() With { _ |
 Note Note |
|---|
Please note that you are not limited to the built-in classes for activities, dependencies, resources and allocations. You can use your own custom objects as you will find out in Tutorial 5. |
Modify the project initialization from the previous tutorial to include the newly created resources like this:
| C#
Copy Code
|
|---|
IProjectViewModel project = activityView.CreateViewModel(activities, dependencies, resources, allocations, typeof(Activity), typeof(Dependency), typeof(Resource), typeof(ResourceAllocation)); |
| Visual Basic
Copy Code
|
|---|
Dim project As IProjectViewModel = activityView.CreateViewModel(activities, dependencies, resources, allocations, GetType(Activity), GetType(Dependency), GetType(Resource), GetType(ResourceAllocation)) |
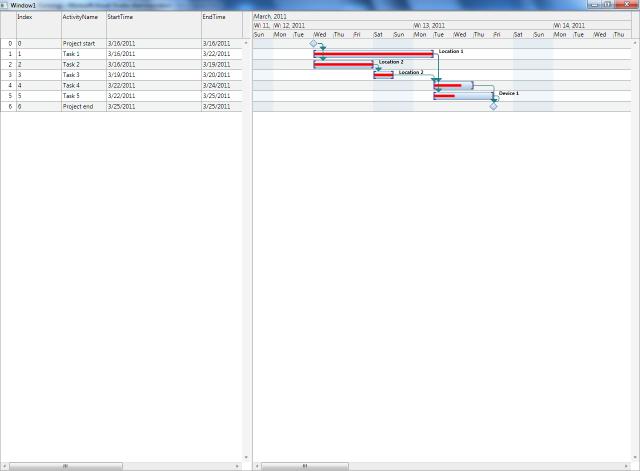
Compile and run the application. The result will be similar to the image below:
| Note |
|---|
You can find the complete source code of this tutorial in the product installation folder, under the folder for the appropriate .NET version and language. |


