In this blog post we will look at 3 different ways to add the JPlanner.jar library to your project in the NetBeans IDE. The projects are:
- Java Application with Maven
- Java Application wtih Gradle
- Java Appliation with Ant
We assume you have downloaded the JPlanner.jar either with the trial version of Scheduling for Java Swing or with one of the samples.
I. Java Application with Maven
Right click on the “Dependencies” node in your project tree and choose “Add Dependency”:

In the dialog that appears you can type the data for the JPlanner.jar. You can check the online documentation for the current version.

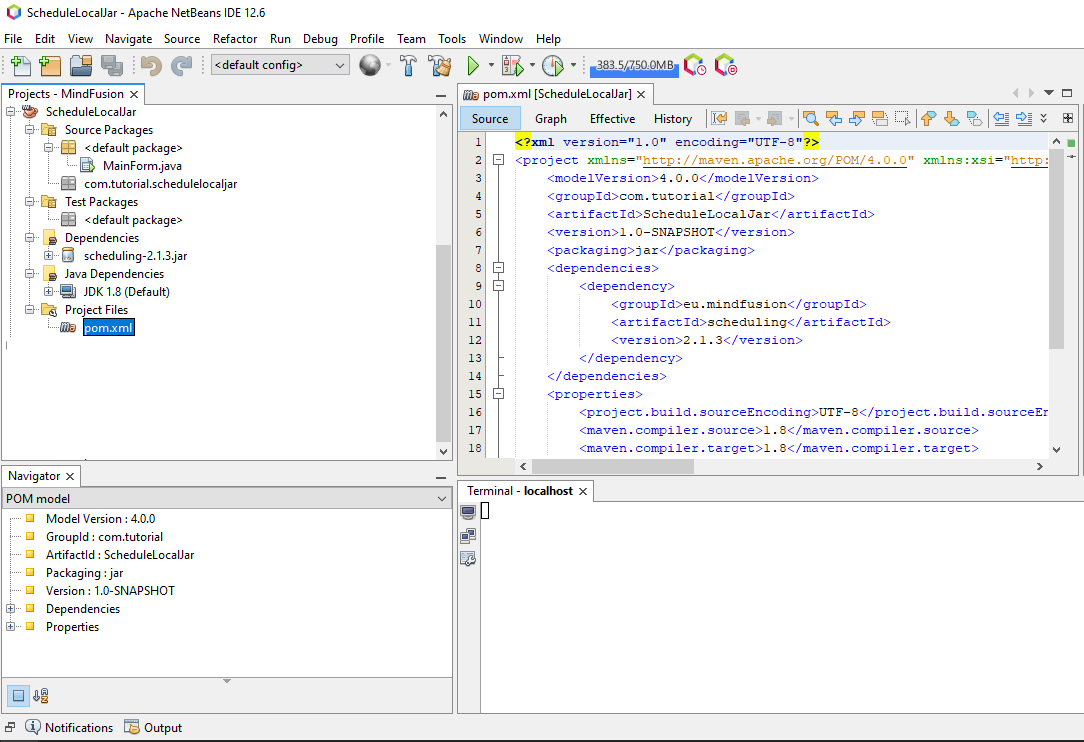
You can edit directly the pom.xml file of the project. Make sure you declare the JPlanner dependency inside the dependencies XML element:
<dependencies>
        <dependency>
         <groupId>eu.mindfusion</groupId>
         <artifactId>scheduling</artifactId>
         <version>2.1.3</version>
     </dependency>
</dependencies>
The pom.xml file is in the “Project Files” folder of your project:

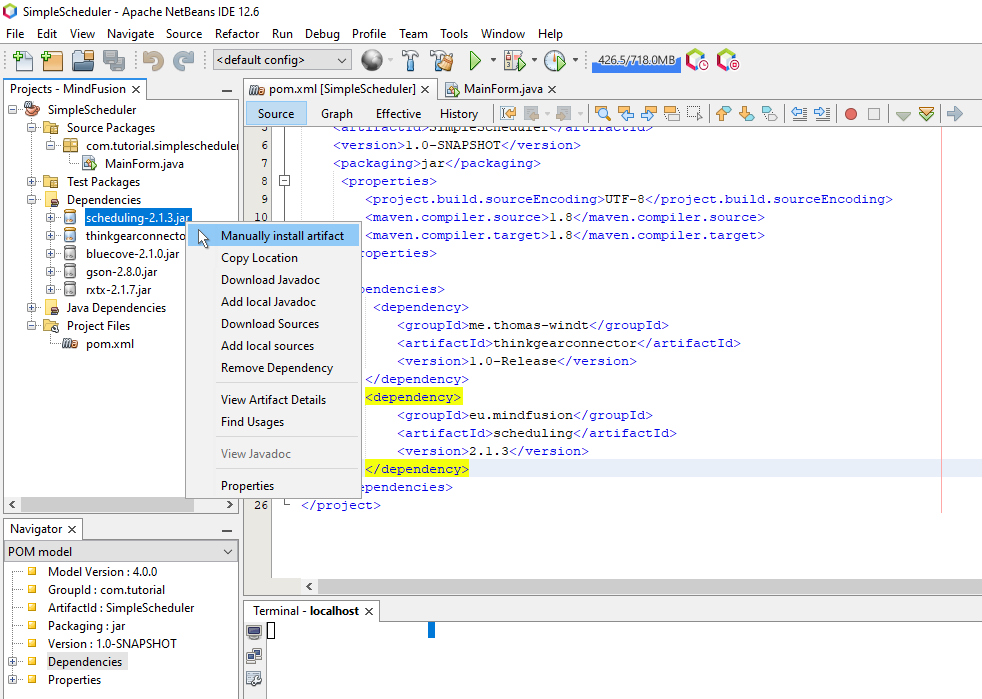
Now you should see the JPlanner.jar under the Dependencies tree node. Now you should load it from your local jar file. Right-click on the dependency and choose ” The last step you should make to load the JPlanner file now is right-click on the dependency and choose “Manually install artifact”:

If the version you have downloaded is the same as the version you’ve described, the installation must be successful and you have now a reference to your local JPlanner file in your maven project in Eclipse Net Beans.
Download a sample Scheduler project for NetBeans with Maven loading a local JPlanner.jar file
II. Java Application with Gradle
Choose a place in the directory of your Gradle project where you want to store the JPlanner.jar file. For our sample project we have chosen to create a new libs folder in the same directory where the src and build folders are located. We have copied the JPlanner.jar there. The build.gradle script is also located there. Since we have to edit it, we can easily specify the location of the JPlanner.jar relatively to the script location.
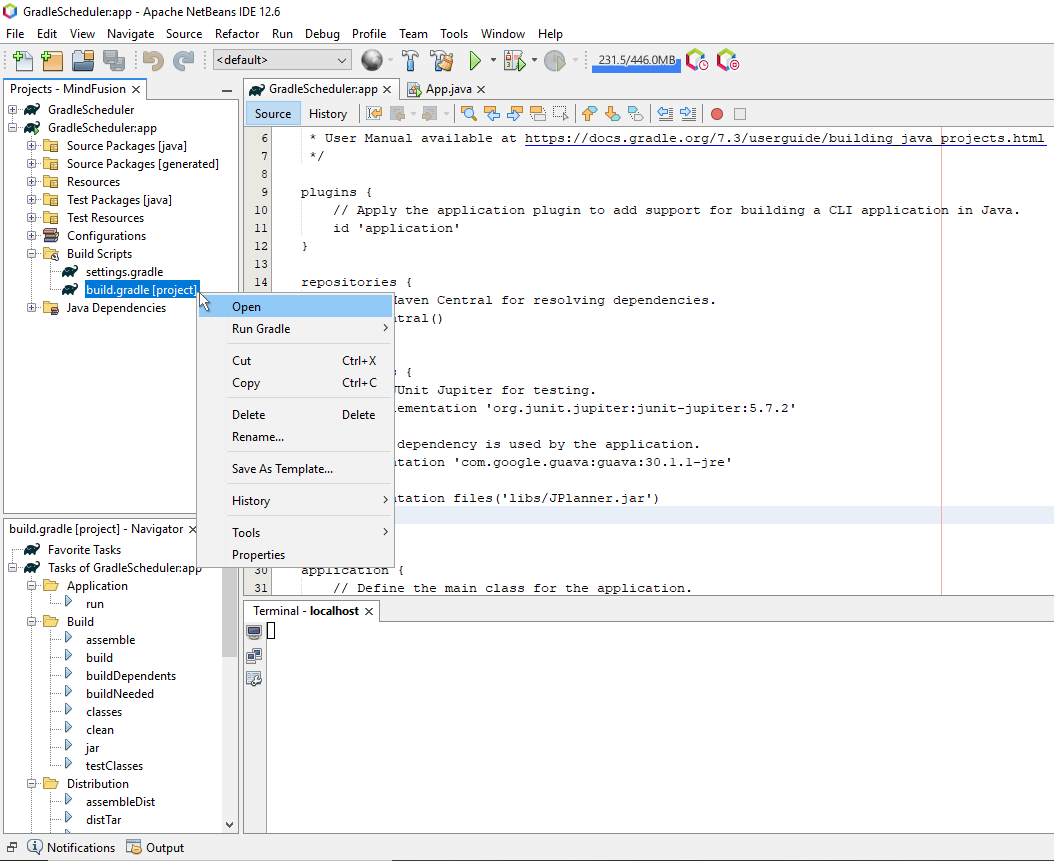
In NetBeans or directly from your hard drive, open the build.gradle script. In NetBeans it is located in the “Build Script” folder:

Find the dependencies section and add the line that loads the JPlanner:
dependencies {

    .....................................

    implementation files('libs/JPlanner.jar')

}
This is the Groovin syntax. If you are using Kotlin your line should be:
implementation(files("libs/JPlanner.jar"))
If the location of your JPlanner.jar is specified correctly, the file should load successfully now and the scheduling namespaces should be accessible in your code.
Download a sample Scheduler project for NetBeans with Gradle loading a local JPlanner.jar file
III. Java Application with Ant
When you create a Java project with Ant you are asked to name the location of library files. The default is lib. Copy the JPlanner.jar into the folder that holds your library files. It appears in the project tree as “Libraries” though its name on the physical drive could be different.
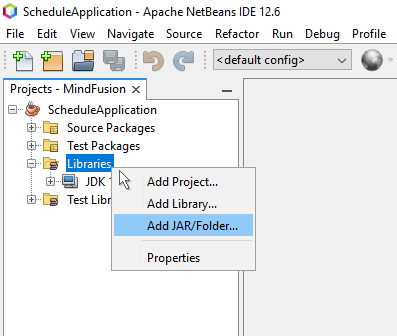
Right-click the Libraries node in the project tree in NetBeans. Choose “Add JAR/Folder”.

Navigate to the folder where you have placed the JPlanner.jar and choose it. After that, you should be able to import the scheduling packages.
Download a sample Scheduler project for NetBeans with Ant loading a local JPlanner.jar file
If you need help using the Java Scheduler with NetBeans, please contact our support team at support@mindfusion.eu or write at the support forum.
About MindFusion Scheduling for Java Swing: The library provides extensive feature-set for creating and customizing all sorts of calendars, task lists, time-management tables, resource allocation tables and other. It boasts various options for customizing appearance and numerous events for handling user actions. The distribution archive includes a lot of samples and detailed documentation. Learn more at https://mindfusion.eu/java-scheduler.html
