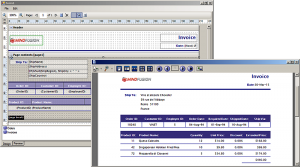
In this post we will show how to create an invoice editing application (using MindFusion.Reporting) for the end users of an organization. The source code of the sample is available for download from here:
https://mindfusion.eu/_samples/ReportingInvoiceEditor.zip
Introduction
We start off by creating a new Windows Forms Application in Visual Studio 2010 or later. Change the target framework of the application to “.NET Framework 4” (or later). The ReportEditor component that will be used as an in-place invoice editor requires at least .NET 4.
Add the ReportEditor component to the main form, set its Dock to Fill.
The invoice template
The invoice template displayed by the application is stored in an XML file. The original template is created beforehand and is located in Invoice.xml. All modifications to the template done by the end users will be stored back to the XML file upon exiting the application. Add the following line to the main form’s constructor to load the invoice template when the main form is constructed:
reportEditor1.OpenReport(@"Invoice.xml");
Adding the data source
From the “Data -> Add New Data Source…” menu in Visual Studio create a new data source from the nwind.mdb database. Select the Orders table and the Invoices query in the Data Source Configuration Wizard. In the XML Schema (nwindDataSet.xsd) ensure that there is a relation between the Orders and Invoices table adapters. The relation should link the OrderID fields of the two tables and should be named “Orders_Invoices”. Build the application so that Visual Studio creates the classes for the data set and the selected table adapters. Go back to the main form designer and add nwindDataSet, InvoicesTableAdapter, and OrdersTableAdapter components to the form. In the constructor of the form, add the following lines in order to fill the data set with the data from the source database:
invoicesTableAdapter1.Fill(nwindDataSet1.Invoices);
ordersTableAdapter1.Fill(nwindDataSet1.Orders);
In addition, we need to register the two tables as data sources in the report editor. This is essential because these data sources are used by the invoice report. It is also important that the data sources are registered before the report is initially loaded through the OpenReport method.
reportEditor1.AddDataSource(nwindDataSet1.Orders, "Orders");
reportEditor1.AddDataSource(nwindDataSet1.Invoices, "Invoices");
Saving the template
Override the OnClosing event of the form and add the following line to ensure that all changes to the invoice template are written back to the XML file:
reportEditor1.SaveReport(@"Invoice.xml");
Adding the menu
Create a menu strip for the application with the following structure:
- File
- Print Preview
- Exit
- Edit
- Undo
- Redo
Add the following event handlers for the menu items:
private void printToolStripMenuItem_Click(object sender, EventArgs e)
{
	var printer = new ReportPrinter();
	printer.Report = reportEditor1.Report;
	printer.Report.Run();
	printer.Print();
}

private void printPreviewToolStripMenuItem_Click(object sender, EventArgs e)
{
	var printer = new ReportPrinter();
	printer.Report = reportEditor1.Report;
	printer.Report.Run();

	var preview = new PrintPreviewForm();
	preview.Document = printer;
	preview.ShowDialog();
}

private void exitToolStripMenuItem_Click(object sender, EventArgs e)
{
	Close();
}

private void undoToolStripMenuItem_Click(object sender, EventArgs e)
{
	reportEditor1.Undo();
}

private void redoToolStripMenuItem_Click(object sender, EventArgs e)
{
	reportEditor1.Redo();
}
The image below illustrates the running application:
The MindFusion.Reporting component can be downloaded from here:
https://www.mindfusion.eu/ReportingTrial.zip
Enjoy!

