MindFusion.WinForms Pack 2014.R3

MindFusion is pleased to announce the release 2014.R3 of the Pack for WinForms component suite. Here is an overview of the new features:

diagram16x16MindFusion.Diagramming

Export to Visio 2013 files
The new Visio2013Exporter class lets you export the contents of Diagram and DiagramDocument objects to Visio 2013 VSDX files. You must add a reference to the MindFusion.Diagramming.Export.Visio.dll assembly beforehand. Further details on how to use the Visio2013Exporter can be found in the forum or the online help.

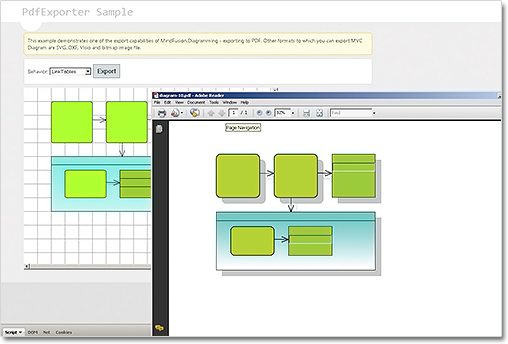
Headers and Footers in PDF
You can now add a header and a footer to all exported to PDF pages. Their content and font are customizable – use HeaderFormat, HeaderFont, FooterFormat and FooterFont to do it.

The PdfExporter

The PdfExporter

Calendar-16x16MindFusion.Scheduling

New Holiday Providers
You can use one of the new holiday providers, added to the MindFusion.HolidayProviders.dll assembly – FranceHolidayProvider, GermanyHolidayProvider, RussiaHolidayProvider, and UKHolidayProvider.

Miscellaneous

  • A new Drawing event enables custom drawing of calendar elements before their default rendering.
  • Improved support for partial databinding.

Spreadsheet-16x16MindFusion.Spreadsheet

Export to XLSX (Office Open XML) format
Use the new ExcelExporter class to export MindFusion.Spreadsheet Workbook objects to Excel. To export a workbook to XLSX, create an instance of the ExcelExporter class and call its Export method, passing the Workbook object as parameter.

Export to ODS (OpenDocument Spreadsheet) format
The new CalcExporter class lets you export MindFusion.Spreadsheet Workbook objects to the OpenDocument format. To export a workbook, create an instance of the CalcExporter class and call its Export method, passing the Workbook object as parameter.

Export to XHTML and MHTML format
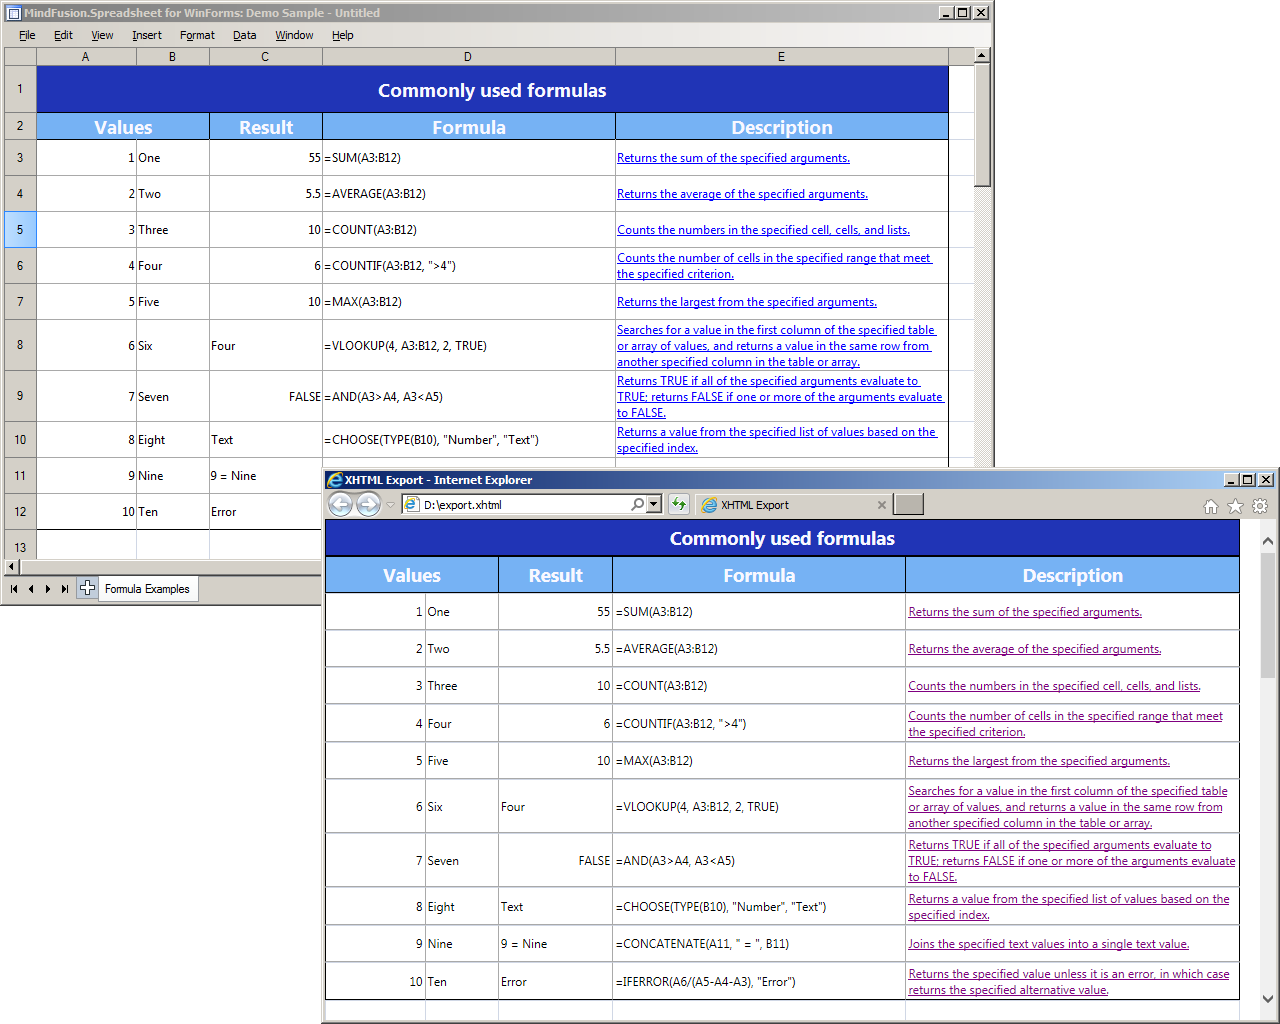
Two new classes – HtmlExporter and MhtmlExporter – let you export MindFusion.Spreadsheet Workbook objects to (X)HTML and MHTML files. To export a workbook, create an instance of the respective exporter class and call its Export method, passing the Workbook object as parameter.

Export to XHTML.

Export to XHTML.

Moving cell ranges
You can move cells and cell ranges programmatically as well interactively. In order to move a column/row programmatically you should call one of the Move overloads of the of the ColumnCollection or RowCollection classes respectively, and specify the column/row to move and the desired location. To move columns or rows interactively, select the columns or rows entirely, click on any of the selected column or row headers and drag.

Find and replace
You can now use a variety of methods to search and replace texts. For searching, use the Find and FindAll methods. For replacing text use Replace and ReplaceAll. The new FindReplaceForm class (contained in the MindFusion.Spreadsheet.WinForms.StandardForms.dll assembly) can be used to facilitate search and replace operations inside a workbook.

Improved in-place editing
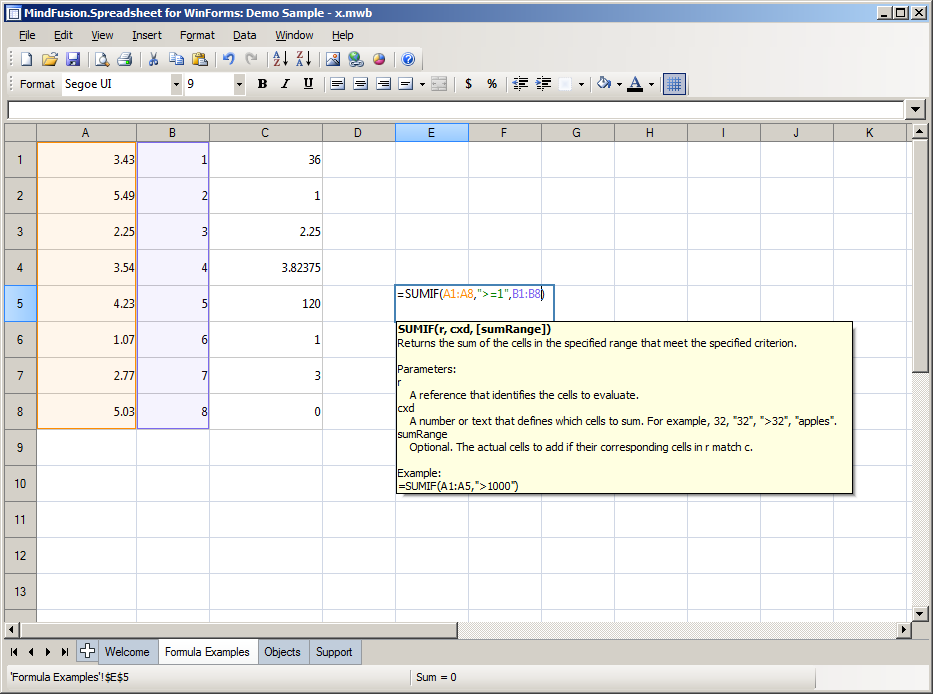
In-place formula editing has been extended with automatic literal, string, cell and cell range coloring
and context-sensitive tooltip information for functions.

In-place editing.

In-place editing.

Miscellaneous

  • The parameters of the Export methods of some exporters have been reordered to improve consistency. Now the Worksheet/Workbook being exported is always the first argument.
  • The HyperlinkForm constructors now require an addition argument of type Workbook.
  • New PageOrientation property added to the PdfExporter class.

uiMindFusion.UI

DockControl
Layout serialization has been added to the DockControl.

The trial version is available for direct download from this link:

Download MindFusion.WinForms Pack 2014.R3

If you run into problems with any of the components, please let us know. We shall be glad to assist you. MindFusion is proud with its excellent technical support – the majority of the questions are answered within hours of receiving them.

About MindFusion.WinForms Pack: A set of five WinForms programming components that provide your application with a rich choice of diagramming, charting, scheduling, mapping, reporting and gauge features. The tools are very easy to implement and use. They boast intuitive API and various step-by-step tutorials to get you started. Both online and offline documentation is available.

A sample browser presents you with all the samples for each control to let you easily navigate to what you need. You can check some of the features of each component right now if you look at the online demos:

Visit the features – page of the components for more information about their capabilities:

You can check the prices and licensing scheme here. All components are royalty-free.

MindFusion.Spreadsheet: Convert XLSX to PDF

In this blog we will discuss how to convert an existing XSLX file to PDF using MindFusion.Spreadsheet for WinForms.

Introduction

As with all previous blogs we start off by creating a new Windows Forms Application in Visual Studio and adding a WorkbookView control to the main form. The WorkbookView displays a Workbook with a single worksheet.

Importing the XLSX file

In MindFusion.Spreadsheet XLSX files are imported using instances of the ExcelImporter class. For the purposes of this blog we will import an existing report.xlsx file, contained in the zip of the sample. To import this file, use the following code:

var importer = new ExcelImporter();
importer.Import(Path.Combine(path, "report.xlsx"), workbook1);

Creating the PDF

To create a PDF file from the imported worksheet, create an instance of the PdfExprter class and call its Export method:

var exporter = new PdfExporter();
exporter.EnableGridLines = true;
exporter.Export(workbook1.Worksheets[0], Path.Combine(path, "report.pdf"));

The following image illustrates the result of the conversion:

spreadsheet-pdfexport

The source code of the sample is available for download from here:

https://mindfusion.eu/_samples/SpreadsheetConvertPdf.zip

The trial version of MindFusion.Spreadsheet for WinForms can be downloaded from here:

Download MindFusion.Spreadsheet for WinForms Trial Version

About MindFusion.Spreadsheet for WinForms: A powerful .NET spreadsheet component with great capabilities for editing, styling and formatting large amounts of data.

MindFusion.Spreadsheet: Import and Export

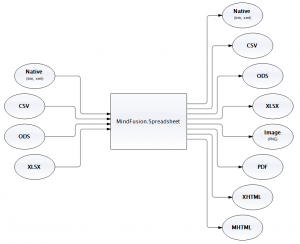
The following scheme illustrates the file formats supported by MindFusion.Spreadsheet for WinForms:

spreadsheet-formats

Importing

MindFusion.Spreadsheet can load data from CSV (comma-separated values), XLSX (Office Open XML), ODS (OpenDocument Spreadsheet), and its native binary and XML formats. The files are imported through a set of importer classes: CsvImporter for CSV, ExcelImporter for XLSX, and CalcImporter for ODS. To import a file, create an instance of the respective importer class, set the necessary properties, and call its Import method. The following code demonstrates how to import a workbook from an existing XLSX file:

var excelImporter = new ExcelImporter();
excelImporter.Import(workbook, @"d:\workbook.xlsx");

Importing from CSV can be further facilitated through the use of a built-in CsvImportForm. The form provides the user interface to enter various options and preview the data before it is actually imported.

Exporting

MindFusion.Spreadsheet can export data to a variety of formats, including image, PDF, CSV, XLSX, ODS, HTML and MHTML. In addition the workbooks can be previewed and printed to paper and XPS. The workbooks and worksheets are exported through a set of exporter classes: ImageExporter for images, PdfExporter for PDF, CsvExporter for CSV, ExcelExporter for XLSX, CalcExporter for ODS, HtmlExporter for XHTML, and so on. Printing is done through the WorkbookPrinter class. To export a workbook, create an instance of the respective exporter class, set the necessary properties, and call the Export method. The following code demonstrates how to export a workbook to ODS:

var calcExporter = new CalcExporter();
calcExporter.Export(workbook, @"c:\mysheet.ods");

The following image illustrates a workbook exported to an XHTML file using the HtmlExporter class:

spreadsheet-xhtmlexport

Additional information about the importing and exporting capabilities of MindFusion.Spreadsheet can be found in the online documentation of the component:

http://www.mindfusion.eu/onlinehelp/spreadsheetwinforms/index.htm?Importing.htm
http://www.mindfusion.eu/onlinehelp/spreadsheetwinforms/index.htm?Exporting_0.htm

The trial version of MindFusion.Spreadsheet for WinForms can be downloaded from here:

Download MindFusion.Spreadsheet for WinForms Trial Version

About MindFusion.Spreadsheet for WinForms: A powerful .NET spreadsheet component with great capabilities for editing, styling and formatting large amounts of data.

WinForms.Spreadsheet: Sorting Data

In this blog we will discuss how to sort existing data in MindFusion.Spreadsheet for WinForms both programmatically and by using the built-in form.

Introduction

As with all previous blogs we start off by creating a new Windows Forms Application in Visual Studio and adding a WorkbookView control to the main form. The WorkbookView displays a Workbook with a single worksheet.

Initializing the data

The data that should be sorted is contained in an CSV (comma-separated value) file, which is loaded at the start of the application. Some minor formatting is applied to the imported data, such as emphasizing the header row. The columns are automatically resized to fit the content through the ResizeColumnsToFit method of the WorkbookView class.

Sorting programmatically

The sorting is performed by calling the Sort method of the Worksheet class and providing a SortOptions object. This object contains information about the sort, such as which row or column to sort by, the sort direction (horizontal or vertical) and so on. In this particular case, we sort the data by columns, therefore we specify TopToBottom for the sort direction:

sortOptions.Direction = SortDirection.TopToBottom;

The columns (or rows) to sort by are specified by SortKey objects, added to the Keys collection of the SortOptions class. The order of the keys in the collection is important. For example, to sort by the first column and then by the fourth column, we define the following keys:

sortOptions.Keys.Add(new SortKey(0));
sortOptions.Keys.Add(new SortKey(3));

The Sort method accepts as argument the range to be sorted. In this sample we would like to prevent the header row from being sorted and specify A2:D15 for the target range.

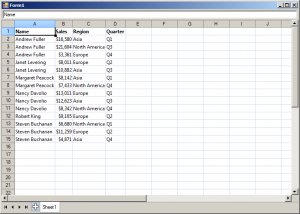
The following image shows the running sample:

spreadsheet-sorting

Sorting through the built-in form

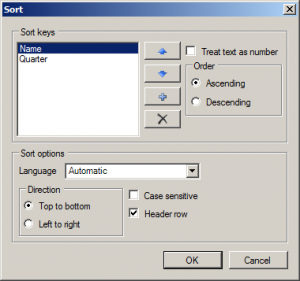
Sorting can also be performed through the built-in SortForm form, contained in the MindFusion.Spreadsheet.WinForms.StandardForms.dll assembly. The image below displays the form with the first and fourth columns selected as sort keys:

spreadsheet-sortform

The source code is available for download from here:

https://mindfusion.eu/_samples/SpreadsheetSorting.zip

The trial version of MindFusion.Spreadsheet for WinForms can be downloaded from here:

Download MindFusion.Spreadsheet for WinForms Trial Version

About MindFusion.Spreadsheet for WinForms: A powerful .NET spreadsheet component with great capabilities for editing, styling and formatting large amounts of data.

WinForms.Spreadsheet: Apply Conditional Formatting

In this blog we will discuss how to apply conditional formatting to a range of cells in MindFusion.Spreadsheet for WinForms. Conditional formatting is a feature that allows you to apply different formatting options, such as background color, borders, or font to cells that meet certain criteria and have this formatting automatically change depending on the value or formula of the cell.

Introduction

We start off by creating a new Windows Forms Application in Visual Studio and adding a WorkbookView control to the main form. The WorkbookView displays a Workbook with a single worksheet.

Initializing the data

The goal of the application is to display an array of temperature values, colored differently based on a standard temperature scale. The data of the application is hard-coded in several arrays, which are used to initialize the worksheet:

var names = new CultureInfo("en-US").DateTimeFormat.AbbreviatedMonthNames;
var avgHigh = new int[] { 4, 7, 12, 17, 21, 25, 28, 28, 23, 18, 10, 4 };
var avgLow = new int[] { -5, -4, 0, 5, 9, 13, 14, 14, 10, 6, 0, -4 };
var recordHigh = new int[] { 16, 17, 24, 28, 29, 32, 37, 34, 34, 30, 24, 17 };
var recordLow = new int[] { -21, -19, -15, -5, -1, 4, 7, 8, -2, -2, -7, -16 };

Applying the conditional formatting

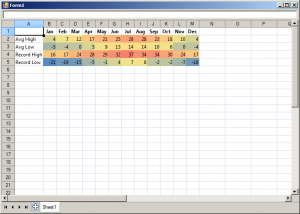
In MindFusion.Spreadsheet conditional formatting is applied to a range of cells through its style. This is done by calling the Style.ConditionalFormats.Add method to create IConditionalFormat objects and then setting the properties of the newly created object to specify the condition criteria and the style to apply when the criteria are met. In this application we use a simple algorithm to distribute temperature values linearly along a blue-yellow-red color scale. When a cell value falls within a specific temperature interval, the conditional formatting applies a background color to this cell to visually indicate the value.

The following image shows the running sample:

spreadsheet-conditionalformats

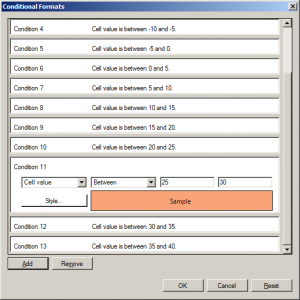
Conditional formatting can also be created and modified through the built-in ConditionalFormatForm form, contained in the MindFusion.Spreadsheet.WinForms.StandardForms.dll assembly. The image below displays the form for the temperature cell range.

spreadsheet-conditionalformatform

The source code is available for download from here:

https://mindfusion.eu/_samples/SpreadsheetConditionalFormats.zip

The trial version of MindFusion.Spreadsheet for WinForms can be downloaded from here:

Download MindFusion.Spreadsheet for WinForms Trial Version

About MindFusion.Spreadsheet for WinForms: A powerful .NET spreadsheet component with great capabilities for editing, styling and formatting large amounts of data.