Implementing drag & drop in MindFusion.Scheduling for WPF

In this post we will discuss how to implement drag & drop using MindFusion.Scheduling for WPF. The goal is to enable users to create appointments by dragging items from an external source and dropping them onto the Calendar control surface.

The source

For the purposes of this sample the drag & drop source would be a simple ListBox control. The following XAML declares a ListBox with several predefined items:

  Task #1
  Task #2
  Task #3
  Task #4
  Task #5
  Task #6

The calendar

To enable the Calendar control to be the target of drag & drop operations, set its AllowDrop property to true. The following XAML snippet illustrates the definition of the Calendar control:

<planner:calendar x:name="calendar" grid.column="1" currentview="ResourceView" grouptype="GroupByResources" theme="Silver" allowdrop="True">
  <planner:calendar.itemresources>
    <planner:resource name="Resource #1">
    <planner:resource name="Resource #2">
    <planner:resource name="Resource #3">
  </planner:resource></planner:resource></planner:resource></planner:calendar.itemresources>
</planner:calendar>

The calendar is set up to display three resources in a Resource view.

The drag & drop

The drag & drop operation is initiated by calling the DragDrop.DoDragDrop static method and passing a reference to the dragged data. In our case we would want to initiate drag & drop when the user clicks on an item in the ListBox and starts dragging. Because the MouseDown event is consumed by the ListBox when the mouse is pressed over an item, we need to handle the PreviewMouseDown event. The following C# code displays the handlers of the PreviewMouseDown and MouseMove events:

private void taskList_PreviewMouseDown(object sender, MouseButtonEventArgs e)
{
  mouseDown = e.LeftButton == MouseButtonState.Pressed;
}

private void taskList_MouseMove(object sender, MouseEventArgs e)
{
  if (taskList.SelectedItem != null && mouseDown)
  {
    mouseDown = false;
    string data = ((ListBoxItem)taskList.SelectedItem).Content.ToString();
    DragDrop.DoDragDrop(taskList, data, DragDropEffects.Copy);
  }
}

To give visual feedback to the user when the mouse moves over the Calendar control during drag & drop operation, handle the DragOver event:

private void calendar_DragOver(object sender, DragEventArgs e)
{
  e.Effects = DragDropEffects.None;
  if (e.Data.GetDataPresent(typeof(string)))
  {
    DateTime? date = calendar.GetDateAt(e.GetPosition(calendar));
    if (date != null)
      e.Effects = DragDropEffects.Copy;
  }
}

This handler checks whether the dragged data matches the expected type and whether the location under the mouse cursor represents a valid date.

Finally, handle the Calendar.Drop event. This event is raised when the user releases the mouse over the Calendar control during a drag & drop operation.

private void calendar_Drop(object sender, DragEventArgs e)
{
  if (e.Data.GetDataPresent(typeof(string)))
  {
    Point point = e.GetPosition(calendar);
    DateTime? date = calendar.GetDateAt(point);
    Resource resource = calendar.GetResourceAt(point);
    if (date != null && resource != null)
    {
      string task = (string)e.Data.GetData(typeof(string));
      Appointment appointment = new Appointment();
      appointment.HeaderText = task;
      appointment.StartTime = date.Value;
      appointment.EndTime = appointment.StartTime.AddDays(2);
      appointment.Resources.Add(resource);
      calendar.Schedule.Items.Add(appointment);
    }
  }
}

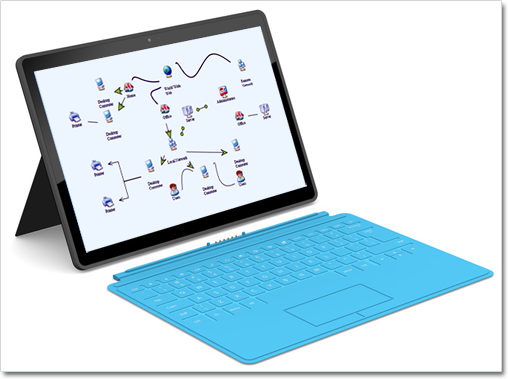
The following image shows the running sample with several created appointments:

Drag & drop

The source code is available for download from here:

Download the Complete Source Code for the Sample

You can get the trial version of MindFusion.Scheduling for WPF from this link:

Download MindFusion.Scheduling for WPF Trial Version

Line Chart in Silverlight with Two Legends, Scatters and Custom Labels

In this post we are discussing how to build a line chart with multiple series, scatters in custom colors,
two legends and custom labels at the X-axis. We are building the chart in Silverlight, using the
MindFusion.Charting for Silverlight tool.

Data

The data for the chart is taken from an ObservableCollection, where each member represents sales for a
given month.

lineChart1.DataSource = sales;

The Axes

The Y-axis shows an auto scale. This is the default LabelType so we don’t need to change it. But we want custom title label and intervals of 100. Here is how we set this:

lineChart1.YAxisSettings.Interval = 100L;
lineChart1.YAxisSettings.TitleOffset = 10.0;
lineChart1.YAxisSettings.Title = "USD";

The X-axis requires more customization. We want to show custom labels, that’s why we must set them and change the LabelType to show them:

lineChart1.XAxisSettings.LabelType = LabelType.CustomText;
lineChart1.XAxisSettings.CustomLabelPosition = CustomLabelPosition.ChartDataPoints;

We use the XLabelPath property to bind the Month field in our DataSource to the X-labels of the chart. We also set the maximum value at the X-axis and draw pointers to the labels by setting the Tick property.


lineChart1.XAxisSettings.MaxValue = sales.Count + 1;
lineChart1.XAxisSettings.Tick = 5.0;

The Series

The data for each series comes from a specific field in the DataSource collection:

lSeries1.YDataPath = "Turnover";
lSeries2.YDataPath = "Profit";

We want to show scatters and we use the ScatterType property to set the type. By default the type is “None” and no scatters are drawn. We need to change that:

lSeries1.ScatterType = ScatterType.Diamond;
lSeries1.ScatterSize = 20;

The brushes for the scatters are set with a BrushCollection:

BrushCollection sBrushes1 = new BrushCollection();
sBrushes1.Add(new SolidColorBrush(Colors.Red));
sBrushes1.Add(new SolidColorBrush(Colors.Yellow));
sBrushes1.Add(new SolidColorBrush(Colors.Green));


lSeries1.ScatterFills = sBrushes1;

Finally, don’t forget to add your LineSeries to the chart:

lineChart1.Series.Add(lSeries1);
lineChart1.Series.Add(lSeries2);

Legends

In this chart we need two legends – one is for the scatters and one for the series. They are both of
type SeriesLegend, which gives us control over the brushes and labels used.

The legend for the scatters is docked to the bottom and is aligned in the center.

MindFusion.Charting.Silverlight.SeriesLegend legend =
new MindFusion.Charting.Silverlight.SeriesLegend();
legend.LabelsSource = new List() { "Higher than expected", "Lower than expected", "Meets expectations"};
legend.BorderBrush = new SolidColorBrush(Colors.LightGray);
LayoutPanel.SetDock(legend, Dock.Bottom);
legend.HorizontalAlignment = System.Windows.HorizontalAlignment.Center;

Here is how we set the brushes:

BrushCollection brushes = new BrushCollection();
brushes.Add(new SolidColorBrush(Colors.Green));
brushes.Add(new SolidColorBrush(Colors.Red));
brushes.Add(new SolidColorBrush(Colors.Yellow));
legend.BrushesSource = brushes;
lineChart1.Legends.Add(legend);

The code for the other legend is similar, but we dock it to the right and align it to the top:

LayoutPanel.SetDock(sLegend, Dock.Right);
sLegend.VerticalAlignment = System.Windows.VerticalAlignment.Top;

Finally, don’t forget to add the two legends to the chart:

lineChart1.Legends.Add(legend);
lineChart1.Legends.Add(sLegend);

Here is the final result:

Line chart with scatters, two legends and custom labels. The platform is Silverlight.

Line chart with scatters, two legends and custom labels. The platform is Silverlight.

The source code is available for download from here:

Download the Complete Source Code for the Sample

You can get the trial version of MindFusion.Charting for Silverlight from this link:

Download MindFusion.Charting for Silverlight Trial Version

Diagramming for ASP.NET MVC 1.5

A new version of MindFusion diagramming tool for ASP.NET MVC is released. Here is a list of the new features:

Node Effects

You can now apply two visual effects – the GlassEffect and AeroEffect to nodes. To apply an effect,
you must create an instance of the GlassEffect or AeroEffect classes, adjust its properties and add the instance to the Effects collection of the node. You should use Diagram.NodeEffects if you want to apply the effects on all nodes. Effects can be applied at any time and this will immediately affect the
appearance of the diagram. You can apply more than one effect of the same type as well effects of
different types simultaneously.

Sample themes for your diagrams.

Sample themes for your diagrams.

Radial Gradients

You can set gradient brushes for nodes with the setBrush method. If your gradient blends only two
colors, you can use the color1 and color2 fields to specify them. For more colors you have colorStops.

Multiple Labels per Link

Use the LinkLabel class to set multiple captions on a single DiagramLink object. Link labels provide a set of properties that allow full customization of their appearance and position. Labels support automatic arrangement to avoid overlapping nodes and other labels – set LinkLabel.AutoArrange to true.

A network chart.

A network chart.

New Events

As well other new methods and features. Read the full list at the news page on the MvcDiagram forum
section.
The trial version of the new release is available for download from the following link:

Download MindFusion.Diagramming for ASP.NET MVC 1.4

Technical Support

If you have any questions about Diagramming for ASP.NET MVC you can post them at the forum, the
help desk, or per e-mail at support@mindfusion.eu. Excellent customer support is one of MindFusion top
priorities and we try to provide competent and detailed answers to your questions within hours of
receiving them.

About Diagramming for ASP.NET MVC Component: It is a multi-purpose diagramming tool that consists of
two parts: a .NET class library running on the server and a client side control implemented in JavaScript.

The server side .NET library implements a flow-diagramming object model that lets you define structures
such as trees, flowcharts and graphs. Every element in the diagram is easily accessible and the whole
diagram is rendered as part of an HTML page by just calling the DiagramView extension method.

On the client the diagram is rendered by a DiagramView JavaScript control that draws its content on an
HTML Canvas. The user is able to add nodes and links simply by drawing them with the mouse. There is
also a NodeListView control, which lets users create new nodes via drag and drop.

MvcDiagram also supports various automatic layout algorithms that will make every diagram easy to
understand and beautiful to look at. The diagram can also be easily serialized in binary or XML format.
Exporting is done in a variety of formats including Pdf, Svg, Visio and more. You can read details about
the components at the MvcDiagram features page.

Create a block diagram editor in JavaScript

In this example, we will create a block diagram editor using MindFusion.Diagramming for JavaScript.

First, let’s add two HTML canvas elements to a page, one for the Diagram control and one for a NodeListView control that will serve as a tool palette:

<!-- The Diagram component is bound to the canvas element below -->

<div style="width:800px; height:600px; overflow:auto; border: 1px solid;">
  <canvas id="diagram" width="2100" height="2100">
    This page requires a browser that supports HTML 5 Canvas element.
  </canvas>
</div>


<!-- NodeListView control -->

<div style="width:130px; height:600px; overflow:none; border: 1px solid rgb(0, 0, 0);">
  <canvas id="nodeList" width="130" height="600"></canvas>
</div>

Next, add references to the necessary script files:

<script src="MicrosoftAjax.js" type="text/javascript"></script>
<script src="MindFusion.Diagramming.js" type="text/javascript"></script>
<script src="BlockDiagEdit.js" type="text/javascript"></script>

In the load handler in the script file, setup the diagram properties and populate the node list with prototype containers and shape nodes, that will represent respectively systems and modules in our block diagrams:

Sys.Application.add_load(function (sender, args)
{
	// create a Diagram component that wraps the "diagram" canvas
	diagram = $create(Diagram, null, null, null, $get("diagram"));
	diagram.addEventListener(Events.nodeCreated, onNodeCreated);
	diagram.addEventListener(Events.linkCreated, onLinkCreated);
	diagram.setLinkHeadShapeSize(3);
	diagram.setLinkHeadShape("Alternative");
	diagram.setAllowInplaceEdit(true);

	// create a NodeListView component that wraps the "nodeList" canvas
	var nodeList = $create(MindFusion.Diagramming.NodeListView,
        null, null, null, $get("nodeList"));
	nodeList.setIconSize(new Size(48, 48));
	nodeList.setDefaultNodeSize(new Size(24, 24));

	var colors = [
		"#FF5555",
		"#55FF55",
		"#5555FF",
		"#FFFFFF"
	];

	// add container to the NodeListView to represent "system" blocks
	for (var i = 0; i < 4; ++i)
	{
		var node = new ContainerNode(diagram);
		node.setBrush(colors[i]);
		nodeList.addNode(node, "System " + (i + 1));
	}

	// add container to the NodeListView to represent "module" blocks
	for (var i = 0; i < 4; ++i)
	{
		var node = new MindFusion.Diagramming.ShapeNode(diagram);
		node.setShape("Rectangle");
		node.setBrush(colors[i]);
		nodeList.addNode(node, "Module " + (i + 1));
	}
});

Handle the nodeCreated event to make containers larger, and start inplace edit operation to let users enter text immediately after dropping a node:

function onNodeCreated(sender, args)
{
	var node = args.getNode();
	if (ContainerNode.isInstanceOfType(node))
	{
		// make containers larger
		var bounds = node.getBounds().clone();
		bounds.width = 100;
		bounds.height = 75;
		node.setBounds(bounds);
	}

	// let user enter text immediately
	diagram.beginEdit(node);
}

When there aren’t anchor points defined, the diagram control snaps link points to nearest point of nodes borders. Let’s automatically align points when links are created to make them straight horizontal or vertical lines if they are already close to being such. Otherwise leave points unchanged to let users draw diagonal lines too:

function onLinkCreated(sender, args)
{
	var link = args.getLink();
	var start = link.getStartPoint();
	var end = link.getEndPoint();

	// make link horizontal if close to being one
	if (Math.abs(start.x - end.x) > 10 && Math.abs(start.y - end.y) < 4)
	{
		end.y = start.y;
		link.setEndPoint(end);
	}

	// make link vertical if close to being one
	if (Math.abs(start.y - end.y) > 10 && Math.abs(start.x - end.x) < 4)
	{
		end.x = start.x;
		link.setEndPoint(end);
	}
}

Here’s the kind of block diagrams and flowcharts you can now draw:
Block diagram

The complete example can be downloaded from this link:
https://mindfusion.eu/_samples/BlockDiagEdit.zip

Enjoy!

Diagramming for WinRT Beta Version

We have almost finished the initial release of MindFusion.Diagramming component for WinRT. The release
implements most of the API of the MindFusion.Diagramming for Silvelright component. You can read the online reference here:

Diagramming for Silvelright Online Reference

MindFusion.Diagramming for WinRT

MindFusion.Diagramming for WinRT

The Magnifier and Overview controls as well the printing functionality are currently not supported.
Single-touch events are equivalent to mouse input in the Silverlight control. Additionally, the WinRT library implements the following multi-touch gestures:

  • dragging two fingers in same direction over a node translates it
  • dragging two fingers in opposite directions over a node scales and/or rotates it
  • dragging two fingers over an unoccupied point pans the diagram

If the diagram is inside a ScrollViewer, multi-touch gestures are handled only if the ManipulationMode property is set to None; otherwise they are intercepted by the parent ScrollViewer control.

When adding references to the MindFusion.* assemblies, their accompanying resource folders (MindFusion.Diagramming and MindFusion.Diagramming.Controls) must be in the same location as the dll files. If copying or moving the diagramming.dll assemblies, you must also copy these folders in order for Visual Studio to discover the necessary resources.

You are welcome to download and test the beta version:

MindFusion.Diagramming for WinRT Beta Version

Your feedback is highly appreciated. You can write your reviews at the forum or at support@mindfusion.eu.
Thank you.