Org Chart in JavaScript with the Diagram Library

In this blog post we will use the Js Diagram library to create a beautiful organizational chart, where people from the company are represented with the hierarchy links between them. Each employee has a photo, name, position, boss and section for comments. The links between them demonstrate the hierarchy.
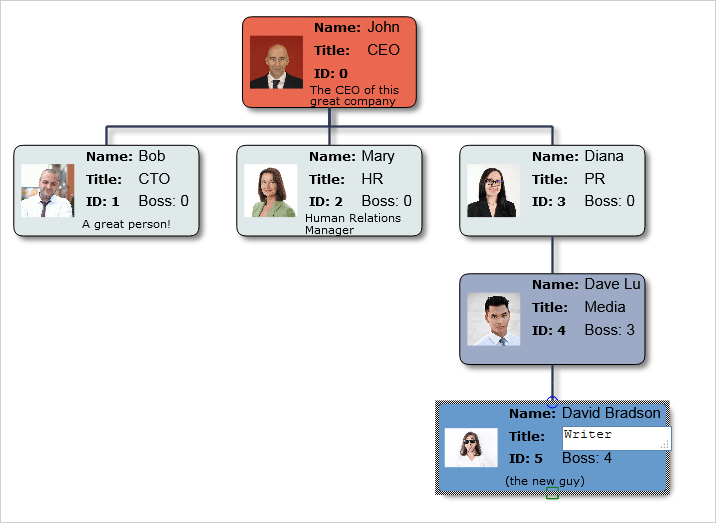
Run the sample from https://mindfusion.eu/samples/javascript/diagram/OrgChart/OrgChartEditor.html

I. Application Setup

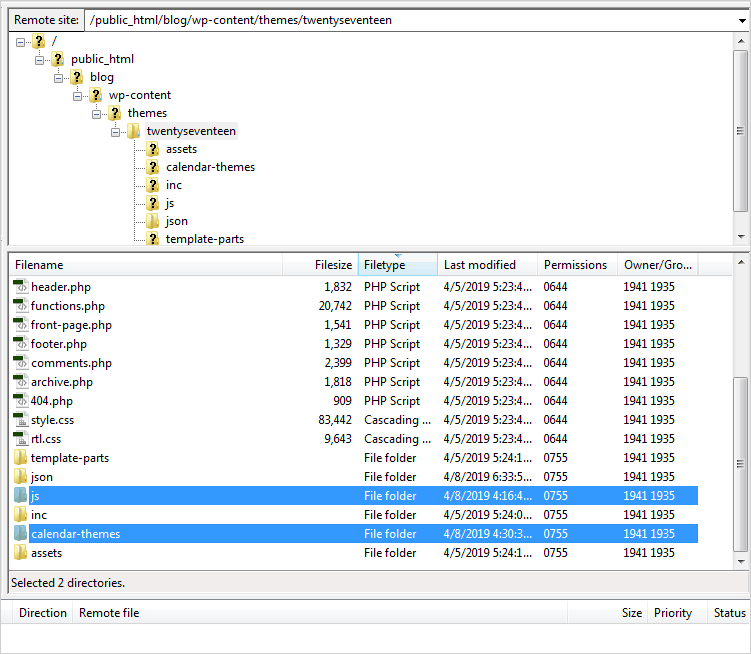
We create a new folder for the project and there we copy the scripts that the sample uses. They are predominantly jQuery scripts, which you can also link from the jQuery CDN website.
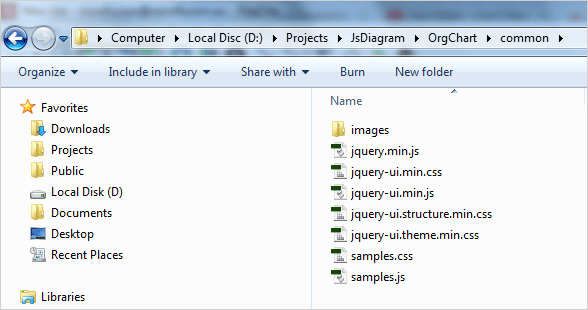
Org Chart in JavaScript: Directory Structure

Org Chart in JavaScript: Directory Structure

The samples.css and samples.js scripts are used by all MindFusion JavaScript samples and are not relevant to your application. They layout and style the HTML content.

We need to create two files for this application – an HTML page and a JavaScript file that will be used by it. We create OrgChartEditor.html and link the following scripts and a CSS file in the section:

<a href="http://common/jquery.min.js">http://common/jquery.min.js</a>
<a href="http://common/jquery-ui.min.js">http://common/jquery-ui.min.js</a>

Then we create an empty (for now) js file that will hold the code-behind for the web page. It is called OrgChartEditor.js. We must reference it, from the HTML but we will do that at the end, before the closing tag. That is done because some browsers might not load correctly the scripts if they are initialize before the HTML code for the canvas.

<a href="http://MindFusion.Common.js">http://MindFusion.Common.js</a>
<a href="http://MindFusion.Diagramming.js">http://MindFusion.Diagramming.js</a>
<a href="http://OrgChartEditor.js">http://OrgChartEditor.js</a>

As you see, we have copied MindFusion.Common.js and MindFusion.Diagramming.js in the directory of the web page. There we have also saved OrgChartEditor.js.

The diagram uses an HTML Canvas to render itself. We create one on the web page:

<!-- The Diagram component is bound to the canvas element below -->
<div style="width: 100%; height: 100%; overflow: auto;">
	<canvas id="diagram" width="2100" height="2100">
		This page requires a browser that supports HTML 5 Canvas element.
	</canvas>
</div>

Note that the element has an id. That’s important because we will reference it in the code behind file.

II. The OrgChartNode.

Each employee on the diagram is represented by a special node – the OrgChartNode. This node is a customized TableNode.

// creates a table node with the default settings
var OrgChartNode = function (parent, boss)
{
       AbstractionLayer.initializeBase(OrgChartNode, this, [parent]);

       this.childNodes = [];

	// set up table cells
	this.redimTable(3, 4);
	this.getCell(1, 3).setColumnSpan(2);
	this.getCell(0, 0).setRowSpan(4);
	this.getCell(1, 1).setText("Title:");
	this.getCell(1, 1).setFont(
            new Font("Verdana", 3.5, true /*bold*/, false /*italic*/));
	this.getCell(1, 2).setFont(
            new Font("Verdana", 3.5, true /*bold*/, false /*italic*/));
	this.getCell(1, 0).setFont(
            new Font("Verdana", 3.5, true /*bold*/, false /*italic*/));
	this.getCell(1, 3).setFont(
            new Font("Verdana", 3, false /*bold*/, false /*italic*/));
	this.configureCells();

Each OrgChartNode has a parent and a boss. The CEO, which is the topmost node in the hierarchy has no boss. The OrgChartNode is a TableNode with 3 columns and four rows. Cell(0,0) is reserved for the image of the employee. It spans 4 rows.

The cells in the second column with index 1 are for labels: title, name, id and comments. We style them with bold font.

The prototype of the OrgChartNode gets or sets the properties which deal with the data we need for each employee. We set the fields for each new node and update the existing canvas elements. We define an updateCanvasElements method that calls the updateCanvasElements of the parent class to mark the changes. We also declare setter/getter methods for each OrgChartNode field:

OrgChartNode.prototype =
{
	// updates the existing elements
	updateCanvasElements: function (node)
	{
		this.setFields();
		AbstractionLayer.callBaseMethod(OrgChartNode, this, 'updateCanvasElements');
	},

        // gets the title of the employee
	getTitle: function ()
	{
		return this.title;
	},
        // sets the title of the employee
	setTitle: function (value)
	{
		if (this.title !== value)
		{
			this.title = value;
			this.invalidate();
		}
	},

When we set a new value we invalidate the canvas so that the changes can be rendered correctly on the screen.

// assigns the employee data to the table cells
setFields: function()
{
    // hide the caption and place the employee names on row 0 
    this.setCaptionHeight(0);
    this.getCell(1,0).setText("Name:")
    this.getCell(2,0).setText(this.fullName);
    ….
    ….
    …..
    // rearrange the org hierarchy
    this.setHierarchy();
    this.setColor();
},

The setFields method takes the data from the OrgChartNode fields and assigns it to the correct cells of the table. It also assigns the correct boss of the employee. In our samples bosses are assigned automatically and cannot be edited by the user. This is done by the setHierarchy method:

// rebuilds the hierarchy
setHierarchy: function ()
{
    // the ceo has no boss
    if (this.boss == undefined)
	{
	   this.hierarchy = 0;
	}
	else
	 {
             // first level of executives under the boss
	     if (this.boss.hierarchy == undefined)
	     {
		  this.hierarchy = 1;
	     }
	     else
	     {
	         // increase the depth of the hierarchy
		 this.hierarchy = this.boss.hierarchy + 1;
		 this.boss.addChild(this);
		}
	  }
         
         // rearrange the hierarchy
	 for (var i = 0; i < this.childNodes; i++)
		this.childNodes[i].setHierarchy();
		this.setColor();
},

The setColor method assigns the right color for the background of the table. Different levels in the hierarchy are distinguished by different colors. The top level – the CEO – is read.

III. Interaction

The org chart allows the users to do a lot of things: edit certain table cells, delete and create nodes, create and delete links, move and drag the nodes. This is done by handling a lot of events that the diagram library exposes.

First, we set the Behavior property of the diagram to “Custom”. This means we will define how the library responds to user actions. This is done because none of the predefined Behavior modes answer the specific needs of our application:

diagram.setBehavior(Behavior.Custom);

Then we start handling events. First, we handle the Clicked event:

diagram.addEventListener(Event.clicked, function (diagram, eventArgs)
{
     // check which mouse button was clicked
     var button = eventArgs.getMouseButton();
     var position = eventArgs.getMousePosition();

     ….
});

We handle differently clicks with the right and left mouse buttons. If it is the right mouse button we should create a new OrgChartNode:

// click with the right mouse button creates a node
if (button === 2)
{
	var node = new OrgChartNode(diagram, undefined);
	node.setBounds(new Rect(position.x, position.y, 20, 20));
	node.resize();

	// adds the node to the diagram items
	diagram.addItem(node);

	// rearrange the diagram
	diagram.arrangeAnimated(tree);
}

Initially, the node has no boss, it will be determined once we link it to the rest of the org chart.

Let’s see what happens when the users clicks on a node:

diagram.addEventListener(Event.nodeClicked, onNodeClicked);

We handle the nodeClicked event with the onNodeClicked method:

// raised when the user clicks on a node
function onNodeClicked(diagram, eventArgs)
{
	// checks if the user has clicked with the left mouse button (0)
	var button = eventArgs.getMouseButton();
	if (button === 0)
		editNode(diagram, eventArgs);

        //click with the right mouse button creates a node
        else if (button === 2)
        createNode(diagram, eventArgs);
}

When the node is clicked with the left mouse button – we edit it. When it is clicked with the right one – we create a new node, linked to it, one level deeper into the hierarchy.

// called when the user edits a table
function editNode(diagram, eventArgs)
{
     var cellEditor = eventArgs.getNode().cellFromPoint(eventArgs.getMousePosition());

     // the table node to edit
     var tableNode = eventArgs.getNode();
     ...
     ...
}

We use the cellFromPoint method to identify the cell that was clicked. The cells that cannot be edited – the ones that render the labels – have no cellEditor.

// cells that cannot be edited have no cellEditor assigned
if (cellEditor.cell != undefined)
       if(cellEditor.cell.editable == true)
	   edit = true;

If the cell can be edited we check which is the cell and what type of content it renders:

// if the cell can be edited
if (edit)
{
	diagram.beginEdit(eventArgs.getNode(),eventArgs.getMousePosition());
	$("diagram_inplaceInput").attr("placeholder", "url");

	cellEditor.cell.onEdited = function (diagram, tableCell)
	{
		if (edit)
		{
			if (cellEditor.cell.image)
			{
				// read and assign the URL of the new image
				if (tableCell.getNewText() != undefined &&
					tableCell.getNewText() != "" &&
					tableCell.getNewText != "undefined")
				{
				tableNode.setImageLocation(tableCell.getNewText());
				cellEditor.cell.text.height = 0;
				cellEditor.cell.text.text = "";
				}
			}
              .....
}

In the code above we check to see if the image location is correctly set and if so – we read the new image from the url and render it in the cell.

Handling the other events is easier, let’s look at the event fired when cell text is edited:

//add an eventListener for the cellTextEdited event
diagram.addEventListener(Event.cellTextEdited, function (diagram, cellArgs)
{
   cellArgs.getCell().onEdited(diagram, cellArgs);
});

Here we just call the onEdited method of the cell that is edited, which we explained above. The samples handles this way a lot of events: nodeDeleted, linkCreated, nodeModified and many more. You can check them in the source code provided with the sample.

IV. Diagram Layout

The org chart uses the predefined TreeLayout to arrange the diagram. It is ideal for hierarchical types of charts because it neatly arranges all nodes from a given level in a row/column based on the direction set.

// we apply the tree layout to arrange the diagram
tree = new MindFusion.Graphs.TreeLayout();

// customize the tree layout
tree.direction = MindFusion.Graphs.LayoutDirection.TopToBottom;
tree.linkType = MindFusion.Graphs.TreeLayoutLinkType.Cascading;

The TreeLayout is animated:

// rearrange the diagram
diagram.arrangeAnimated(tree); 

It is called not only at the beginning but also each time a new node is created or deleted, link is created and/or deleted as well when link or node is edited.

V. New Nodes

Finally, let’s see how nodes are created in code:

var ctoNode = new OrgChartNode(diagram, ceoNode);
ctoNode.setBounds(new Rect(25, 55, 60, 25));
ctoNode.setBoss(ceoNode);
ctoNode.setTitle("CTO");
ctoNode.setFullName("Bob Smith");
ctoNode.setImageLocation("cto.png");
ctoNode.setComment("A great person!");
ctoNode.resize();
diagram.addItem(ctoNode);

New nodes, as you already know are created by the user with a right mouse button click on any node. If a link is deleted, the node is detached from the hierarchy and the user should drop it over an existing node to indicate its place in the hierarchy.

With this we finish our sample. We have presented you with the most important information on how this org chart in JavaScript is created. You can download the complete source code of the sample from this link:

Download MindFusion JavaScript Organizational Chart Sample

The sample is also available on GitHub at https://github.com/MindFusionComponents/JavaScript-Diagram-Samples/tree/master/OrgChart

The sample is available online at https://mindfusion.eu/samples/javascript/diagram/OrgChart/OrgChartEditor.html

Find out more about MindFusion JavaScript Diagram Library at https://mindfusion.eu/javascript-diagram.html
Collaborative drawing with MindFusion.Diagramming and SignalR

In this post we’ll show how to use the ASP.NET MVC diagram library and SignalR to implement collaborative drawing of diagrams. This can be useful in visual planning tools where users work together on a task, such as project management or mind-mapping applications.

The complete sample project is available here –
CollabMindMap.zip

Start by creating an ASP.NET MVC application in Visual Studio. Open Tools -> Library Package Manager -> Package Manager Console and install the MindFusion.Diagramming.Mvc package –

Install-Package MindFusion.Diagramming.Mvc 

While we are there, also install the SignalR package –

install-package Microsoft.AspNet.SignalR

From the project’s context menu, Add submenu, select OWIN startup class and add SignalR to the OWIN pipeline by calling –

app.MapSignalR();

Now lets add a diagram view to the home page at Views/Home/Index.cshtml, load the necessary script files and wire up diagram event handlers that will send change notifications to the hub –

@using MindFusion.Diagramming
@using MindFusion.Diagramming.Mvc

@{
    var diagView = new DiagramView("diagramView")
        .NodeCreatedScript("onNodeCreated")
        .NodeModifiedScript("onNodeModified")
        .NodeTextEditedScript("onNodeTextEdited")
        .LinkCreatedScript("onLinkCreated")
        .LinkModifiedScript("onLinkModified")
        .LinkTextEditedScript("onLinkTextEdited")
        .ControlLoadedScript("onDiagramLoaded")
        .SetAllowInplaceEdit(true);

    diagView.Diagram.DefaultShape = Shapes.Ellipse;
}

@Html.DiagramView(diagView, new { style = "width:700px; height:600px;" })

@section scripts
{
    @Scripts.Render("~/Scripts/jquery.signalR-2.0.0.js")
    @Scripts.Render("~/Scripts/MindMap.js")
    @Scripts.Render("~/signalr/hubs")
}

The hub will synchronize operations done on the diagram by one client by sending a notification to all other connected clients. From the project context menu add a SignalR hub class, naming it DiagramHub. The model class we’ll use to describe node changes looks like this –

public class NodeModel
{
    [JsonProperty("x")]
    public double X { get; set; }

    [JsonProperty("y")]
    public double Y { get; set; }

    [JsonProperty("width")]
    public double Width { get; set; }

    [JsonProperty("height")]
    public double Height { get; set; }

    [JsonProperty("id")]
    public string Id { get; set; }

    [JsonProperty("text")]
    public string Text { get; set; }
}

Add these three methods to the hub class to synchronize node creation, move, resize and edit-text operations –

public void NodeCreated(NodeModel clientModel)
{
    Clients.AllExcept(Context.ConnectionId).nodeCreated(clientModel);
}
public void NodeModified(NodeModel clientModel)
{
    Clients.AllExcept(Context.ConnectionId).nodeModified(clientModel);
}
public void NodeTextEdited(NodeModel clientModel)
{
    Clients.AllExcept(Context.ConnectionId).nodeTextEdited(clientModel);
}

The diagram event handlers in MindMap.js fill in the model objects and call respective hub methods –

function onNodeCreated(s, e)
{
    var hubId = $.connection.hub.id;
    e.node.id = hubId + s.getItems().length;

    var r = e.node.bounds;
    var model =
    {
        id: e.node.id,
        x: r.x,
        y: r.y,
        width: r.width,
        height: r.height
    };
    
    diagramHub.server.nodeCreated(model);
}

function onNodeModified(s, e)
{
    var r = e.node.bounds;
    var model =
    {
        id: e.node.id,
        x: r.x,
        y: r.y,
        width: r.width,
        height: r.height
    };
    diagramHub.server.nodeModified(model);
}

function onNodeTextEdited(s, e)
{
    var model =
    {
        id: e.node.id,
        text: e.getNewText()
    };
    diagramHub.server.nodeTextEdited(model);
}

Handle notifications sent from server to clients by updating the diagram from received model objects –

$(function ()
{
    diagramHub = $.connection.diagramHub;
    diagramHub.client.nodeCreated = function (model)
    {
        var node = diagram.factory.createShapeNode(
            model.x, model.y, model.width, model.height);
        node.id = model.id;
    };
    diagramHub.client.nodeModified = function (model)
    {
        var node = findNode(model.id);
        node.setBounds(
            new MindFusion.Drawing.Rect(
                model.x, model.y, model.width, model.height),
            true);
    };
    diagramHub.client.nodeTextEdited = function (model)
    {
        var node = findNode(model.id);
        node.setText(model.text);
    };
    $.connection.hub.start();
});

Finally add these helper functions for finding items and storing a global diagram reference –

function onDiagramLoaded(s, e)
{
    diagram = s;
}

function findNode(id)
{
    for (var i = 0; i < diagram.nodes.length; i++)
    {
        var node = diagram.nodes[i];
        if (id == node.id)
            return node;
    }
    return null;
}

function findLink(id)
{
    for (var i = 0; i < diagram.links.length; i++)
    {
        var link = diagram.links[i];
        if (id == link.id)
            return link;
    }
    return null;
}

Start several copies of the application in separate browser instances on your system (or even on different machines if you publish it on IIS or Azure). Now start drawing nodes, moving them or editing their text – changes done on the diagram in one browser will be immediately reflected in all other browsers connected to the hub. However we aren’t yet synchronizing link operations; lets fix that –

public class LinkModel
{
    [JsonProperty("id")]
    public string Id { get; set; }

    [JsonProperty("originId")]
    public string OriginId { get; set; }

    [JsonProperty("destinationId")]
    public string DestinationId { get; set; }

    [JsonProperty("text")]
    public string Text { get; set; }
}

Add following hub methods in server class –

public void LinkCreated(LinkModel clientModel)
{
    Clients.AllExcept(Context.ConnectionId).linkCreated(clientModel);
}
public void LinkModified(LinkModel clientModel)
{
    Clients.AllExcept(Context.ConnectionId).linkModified(clientModel);
}
public void LinkTextEdited(LinkModel clientModel)
{
    Clients.AllExcept(Context.ConnectionId).linkTextEdited(clientModel);
}

Call them from respective JavaScript handlers of diagram link events –

function onLinkCreated(s, e)
{
    var hubId = $.connection.hub.id;
    e.link.id = hubId + s.getItems().length;

    var model =
    {
        id: e.link.id,
        originId: e.link.getOrigin().id,
        destinationId: e.link.getDestination().id,
    };
    
    diagramHub.server.linkCreated(model);
}

function onLinkModified(s, e)
{
    var hubId = $.connection.hub.id;
    var model =
    {
        id: e.link.id,
        originId: e.link.getOrigin().id,
        destinationId: e.link.getDestination().id,
    };
    diagramHub.server.linkModified(model);
}

function onLinkTextEdited(s, e)
{
    var model =
    {
        id: e.link.id,
        text: e.getNewText()
    };
    diagramHub.server.linkTextEdited(model);
}

Handle link-related client notifications by creating or modifying links –

diagramHub.client.linkCreated = function (model)
{
    var link = diagram.factory.createDiagramLink(
        findNode(model.originId), findNode(model.destinationId));
    link.id = model.id;
};
diagramHub.client.linkModified = function (model)
{
    var link = findLink(model.id);
    link.setOrigin(findNode(model.originId));
    link.setDestination(findNode(model.destinationId));
};
diagramHub.client.linkTextEdited = function (model)
{
    var link = findLink(model.id);
    link.setText(model.text);
};

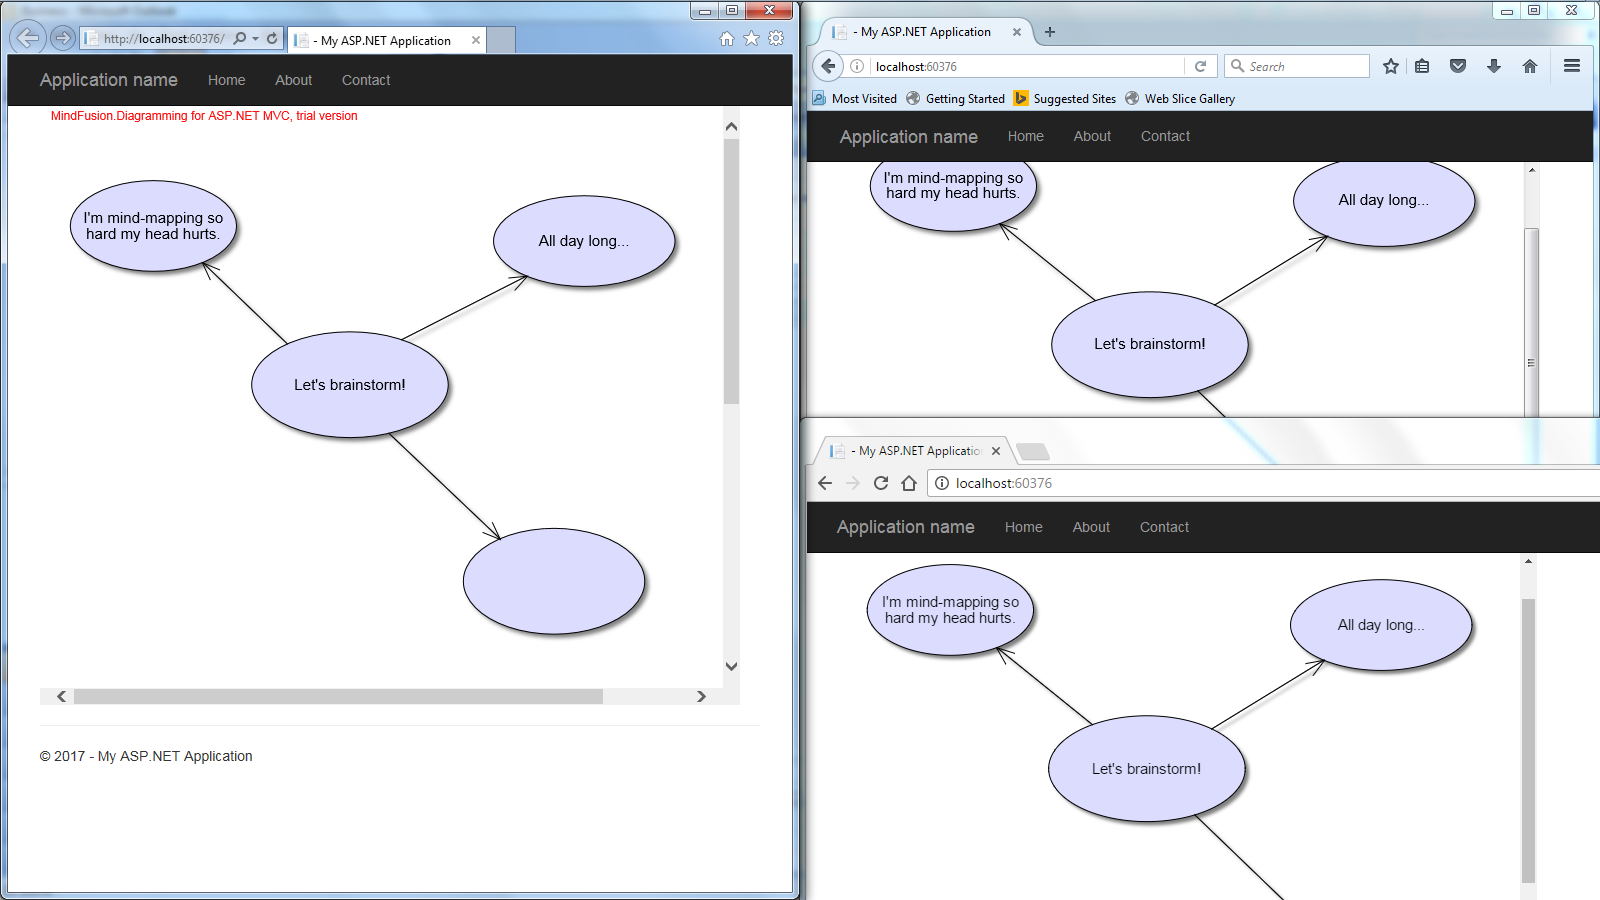
Now the application will also synchronize link operations across all connected clients. Here’s a small diagram synchronized between three different browsers –
collaborative mind map

The sample above uses MindFusion’s ASP.NET MVC API. Code for other frameworks will look similar as MindFusion maintains same diagramming model for multiple platforms. You can download the trial version of any MindFusion.Diagramming component from this page.

Enjoy!

JavaScript Diagram Library, V2.8 Released

The new JavaScript library has been released with the following new features:

Fluent API

Builder objects with property setters and shortcut methods for font and brush creation add support for fluent programming style. Static With and instance init methods in DiagramItem, Style and Layout -derived classes return a builder instance that can be used to set up respective new or existing objects.

DiagramLink improvements

  • HeadStroke, HeadStrokeThickness and HeadStrokeDashStyle properties let you customize arrowhead strokes independently of line segments strokes.
  • The AllowSelfLoops property of Diagram class controls whether users are allowed to draw self-loop links.
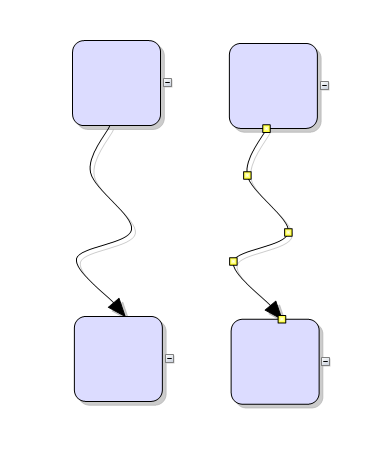
  • The new Spline element of LinkShape enumeration draws links as interpolating splines that pass through all of their control points.
The new JS Diagram boasts improved DiagramLink-s.

The new JS Diagram boasts improved DiagramLink-s.

Miscellaneous

A trial version is available for download here:

Download MindFusion Diagram Library for JavaScript, V2.8

About Diagramming for JavaScript Library: Written 100% in JavaScript, this tool is a dynamic, browser based visualization library that uses HTML5 Canvas to draw impressive diagrams, schemes, flowcharts, trees and many more. It is browser independent, easy to use and allows you to integrate interactive diagrams for JavaScript and HTML into any web application. This MindFusion graphing library supports a variety of predefined node shapes, customizable links, rich event set and many appearance options.

The user interaction model includes resizing / moving / selecting and modifying any diagram element. The library boasts an elegant API, which is documented in details, numerous step-by-step guides and tutorials. The Diagramming API also provides TypeScript definitions. Various samples are provided to let you learn quickly how to use the most important features of the library – check them here. The JavaScript diagram builder is not only the perfect choice for creating any type of diagram in the browser – it can also arrange it the way you wish with a mouse click using one of its automatic graph layout algorithms. For more details about the features of the component, please visit the Diagram for JavaScript page.

Lane diagram in JavaScript

In this post we will show how to use the JavaScript diagram library to create a lane diagram. The complete example is available here:

Lanes.zip

Create a new HTML page and add references to the jQuery library and to the MindFusion.Diagramming library:

<script src="jquery.min.js" type="text/javascript"></script>
<script src="MindFusion.Common.js" type="text/javascript"></script>
<script src="MindFusion.Diagramming.js" type="text/javascript"></script>

Create shortcuts to some classes from the diagram model:

var Events = MindFusion.Diagramming.Events;
var Diagram = MindFusion.Diagramming.Diagram;
var AnchorPattern = MindFusion.Diagramming.AnchorPattern;
var AnchorPoint = MindFusion.Diagramming.AnchorPoint;
var Alignment = MindFusion.Diagramming.Alignment;
var MarkStyle = MindFusion.Diagramming.MarkStyle;
var Style = MindFusion.Diagramming.Style;
var Theme = MindFusion.Diagramming.Theme;
var LinkShape = MindFusion.Diagramming.LinkShape;
var Shape = MindFusion.Diagramming.Shape;
var LaneGrid = MindFusion.Diagramming.Lanes.Grid;
var LaneHeader = MindFusion.Diagramming.Lanes.Header;
var LaneStyle = MindFusion.Diagramming.Lanes.Style;
var Rect = MindFusion.Drawing.Rect;
var Point = MindFusion.Drawing.Point;
var HandlesStyle = MindFusion.Diagramming.HandlesStyle;

Next, add a canvas the the page and create a diagram from it by using the Diagram.create() method:

diagram = Diagram.create($("#diagram")[0]);

You can obtain a reference to the diagram lane grid by calling the Diagram.getLaneGrid() method. You can use the returned object to add rows and columns to the grid and customize its appearance. Finally, to display the grid, call Diagram.setShowLaneGrid(). The customization is omitted here for brevity, but the full code is available in the associated sample project.

The lane grid implies some restrictions to the node and links inside of it. For example, the nodes can be moved only inside the row lanes of the grid. To enforce those restrictions, we will handle several diagram events:

diagram.addEventListener(Events.nodeCreated, onNodeCreated);
diagram.addEventListener(Events.nodeModified, onNodeModified);
diagram.addEventListener(Events.linkCreated, onLinkCreated);

In the nodeCreated event handler, get the gird cell at the top left of the node’s bounding rectangle and align the node to this cell:

function onNodeCreated(sender, e) {
    var node = e.getNode();
    node.setAnchorPattern(pattern);
    node.setHandlesStyle(HandlesStyle.HatchHandles3);

    // Place the box within the grid
    var bounds = node.getBounds();
    var topLeft = new Point(bounds.x, bounds.y);

    var cellBoundsReciever = {};
    if (!grid.getCellFromPoint(topLeft, cellBoundsReciever))
        return;
    var cellBounds = cellBoundsReciever.cellBounds;

    var pixel = 1;

    bounds.y = cellBounds.y + pixel;
    bounds.height = cellBounds.height - 2 * pixel;
    node.setBounds(bounds);
}

Similar rules can be applied to the links in the linkCreated event handler.

The following image illustrates the grid in action:

JavaScript Swimlane Diagram

For more information on MindFusion JavaScript diagram library, see its help reference and overview page.

Enjoy!

Class inheritance diagram in JavaScript

In this post we will show how to use the JavaScript diagram library to generate a class inheritance diagram. The complete example is available here:

InheritanceDiagram.zip

and a live version here:

http://mindfusion.eu/demos/jsdiagram/Inheritance.html

Let’s start by creating shortcuts to some classes from the diagram model:

var Diagram = MindFusion.Diagramming.Diagram;

var DiagramItem = MindFusion.Diagramming.DiagramItem;
var DiagramLink = MindFusion.Diagramming.DiagramLink;
var DiagramNode = MindFusion.Diagramming.DiagramNode;
var ShapeNode = MindFusion.Diagramming.ShapeNode;
var TableNode = MindFusion.Diagramming.TableNode;
var ContainerNode = MindFusion.Diagramming.ContainerNode;
var FreeFormNode = MindFusion.Diagramming.FreeFormNode;
var SvgNode = MindFusion.Diagramming.SvgNode;

var ScrollBar = MindFusion.Diagramming.ScrollBar;
var Rect = MindFusion.Drawing.Rect;
var Font = MindFusion.Drawing.Font;
var TreeLayout = MindFusion.Graphs.TreeLayout;

Next, create a function that takes a Diagram instance and a list of class names as parameters. It will create a TableNode for each class. Each property of the class prototype is listed in a TableNode cell. If the getBaseType function detects a class inherits another one from the list, we’ll create a link between their nodes. Finally, the diagram is arranged using the TreeLayout algorithm.

function createClassDiagram(diagram, classes)
{
    var classConstructors = [];

    // create a table node for each class
    for (var i = 0; i < classes.length; i++)
    {
        var className = classes[i];
        var node = diagram.getFactory().createTableNode(20, 20, 42, 42);
        node.redimTable(1, 0);
        node.setText(className);
        node.setBrush("white");
        node.setCaptionBackBrush("lightgray");
        node.setCaptionFont(
            new Font("sans-serif", 3, true /*bold*/, true /*italic*/));
        node.setScrollable(true);

        var ctor = eval(className);
        for (var property in ctor.prototype)
        {
            node.addRow();
            node.getCell(0, node.rows.length - 1).setText(property);
        }
        classConstructors.push(ctor);
        ctor.classNode = node;
    }
	
    // create a diagram link for each prototype inheritance
    classConstructors.forEach(function(ctor)
    {
        var base = getBaseType(ctor);
        if (base && base.classNode)
        {
            var link = diagram.factory.createDiagramLink(
                base.classNode,
                ctor.classNode);
            link.setHeadShape(null);
            link.setBaseShape("Triangle");
            link.setBaseShapeSize(3);
        }
    });

    // arrange as a tree
    var treeLayout = new TreeLayout();
    treeLayout.linkType = MindFusion.Graphs.TreeLayoutLinkType.Cascading;
    diagram.arrange(treeLayout);
}

The getBaseType implementation checks if a class was registered as a base for the argument using MindFusion.registerClass method or the common prototype inheritance pattern.

function getBaseType(ctor)
{
    // if class registered using MindFusion.registerClass
    if (ctor.__baseType)
        return ctor.__baseType;

    // if  prototypical inheritance with Child.prototype = new Parent()
    if (ctor.prototype && ctor.prototype.constructor != ctor)
        return ctor.prototype.constructor;
	
    return null;
}

The ready handler creates a Diagram instance binding it to a #diagram canvas element. It then calls createClassDiagram with a list of DiagramItem -derived classes as argument:

$(document).ready(function ()
{
    TableNode.prototype.useScrollBars = true;
    ScrollBar.prototype.background = "Lavender";
    ScrollBar.prototype.foreground = "DarkGray";

    // create a Diagram component that wraps the "diagram" canvas
    var diagram = Diagram.create($("#diagram")[0]);

    createClassDiagram(diagram,
    [
        "DiagramItem",
        "DiagramLink",
        "DiagramNode",
        "ShapeNode",
        "TableNode",
        "ContainerNode",
        "FreeFormNode",
        "SvgNode"
    ]);
});

If you run the sample now, you should see this nice visualization of MindFusion classes 🙂

JavaScript class inheritance diagram

For more information on MindFusion JavaScript diagram library, see its help reference and overview page.

Enjoy!